The Ultimate Guide to Shut Off Valves Under Your Sink
Discovering a leak under your kitchen or bathroom sink is never a welcome surprise. But knowing how to quickly and effectively address the situation can save you from costly water damage and headaches. One of the most crucial components in this scenario is the shut off valve under the sink. This seemingly small piece of plumbing hardware can be your best friend in an emergency, allowing you to stop the flow of water to a specific fixture without turning off the water supply to your entire home. This comprehensive guide will provide you with everything you need to know about shut off valves, from identifying different types to troubleshooting common issues. We will explore their importance, functionality, and how to use them correctly, empowering you to confidently handle minor plumbing emergencies.
Understanding the Vital Role of Shut Off Valves
Shut off valves, also known as stop valves, are essential components of your home’s plumbing system. They are designed to control the water flow to individual fixtures, such as sinks, toilets, and appliances. Their primary function is to allow you to isolate a specific area of your plumbing for repairs or replacements without disrupting the water supply to the rest of your house. Imagine trying to replace a leaky faucet without a shut off valve – you’d have to turn off the main water supply, leaving everyone in the house without water until the job is done. This is where the shut off valve under the sink comes in handy, providing a convenient and localized solution.
Beyond convenience, shut off valves play a crucial role in preventing water damage. In the event of a burst pipe or a leaking faucet, quickly turning off the water supply to the affected fixture can minimize the amount of water that escapes, potentially saving you thousands of dollars in repairs. A functioning shut off valve is a critical line of defense against water damage.
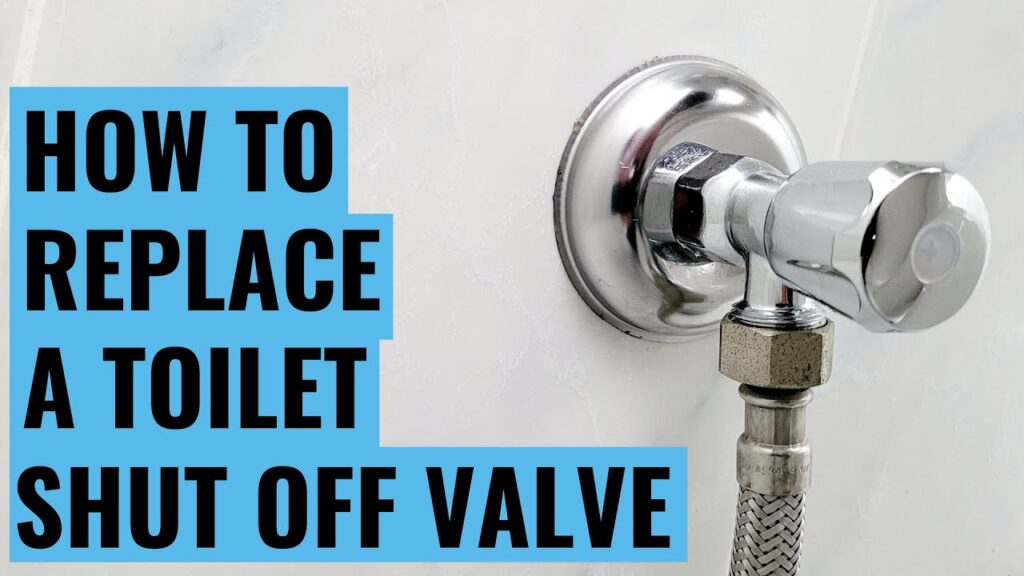
Types of Shut Off Valves Commonly Found Under Sinks
Several types of shut off valves are commonly used under sinks, each with its own advantages and disadvantages. Understanding the differences between them will help you identify the type you have and troubleshoot any issues you might encounter.
- Straight Stop Valves: These valves have an inlet and outlet that are aligned in a straight line. They are typically used when the water supply pipe comes directly out of the wall behind the sink.
- Angle Stop Valves: Angle stop valves have an inlet and outlet that are at a 90-degree angle to each other. They are used when the water supply pipe comes up from the floor. These are very common, perhaps even the most common.
- Compression Valves: These valves use a compression fitting to connect to the water supply pipe. The fitting consists of a compression nut, a compression ring (or ferrule), and the valve body. When the nut is tightened, the ring compresses against the pipe, creating a watertight seal.
- Solder Valves: Solder valves are connected to copper pipes using solder. This creates a permanent, leak-proof connection. However, soldering requires specialized tools and skills, so it’s not a DIY-friendly option for everyone.
- Push-Fit Valves: These valves use a push-fit connection to connect to the water supply pipe. They are easy to install and require no special tools. Simply push the valve onto the pipe until it clicks into place.
- Ball Valves: Ball valves use a ball with a hole in the center to control the water flow. When the handle is turned, the ball rotates, aligning the hole with the pipe to allow water to flow through, or blocking the hole to stop the flow.
- Multi-Turn Valves: These valves require several turns of the handle to fully open or close the valve. They offer more precise control over the water flow, but they can be slower to operate in an emergency.
- Quarter-Turn Valves: Quarter-turn valves only require a quarter turn of the handle to fully open or close the valve. They are quick and easy to operate, making them a good choice for emergency situations.
Identifying the Best Shut Off Valve for Your Needs
Choosing the right shut off valve under the sink depends on several factors, including the type of plumbing in your home, your DIY skills, and your budget. If you are replacing an existing valve, it is generally best to choose the same type of valve. This will ensure that it is compatible with your existing plumbing.
For DIYers, push-fit valves are often the easiest to install, as they require no special tools or skills. Compression valves are also relatively easy to install, but they do require a wrench. Solder valves are best left to professionals, as soldering can be tricky.
Consider the speed of operation. Quarter-turn valves are faster to operate than multi-turn valves, which can be an advantage in an emergency. Consider the material of the valve. Brass valves are durable and corrosion-resistant, but they can be more expensive than plastic valves. Plastic valves are less expensive, but they may not be as durable.
Step-by-Step Guide to Replacing a Shut Off Valve
Replacing a shut off valve under the sink is a relatively straightforward task that most homeowners can handle with a few basic tools and some patience. However, it’s crucial to proceed carefully and follow the steps to avoid any plumbing mishaps. Always remember to turn off the main water supply before commencing any plumbing work.
- Gather Your Tools and Materials: You will need a new shut off valve, a wrench, a bucket, a towel, and possibly a pipe cutter (if you need to shorten the water supply pipe).
- Turn Off the Water Supply: Locate the main water shut off valve for your home and turn it off. This is usually located in the basement, garage, or near the water meter.
- Drain the Water Lines: Open the faucet connected to the shut off valve you are replacing to relieve pressure and drain any remaining water in the lines. Place a bucket under the valve to catch any drips.
- Disconnect the Old Valve: Use a wrench to loosen the connections on either side of the old shut off valve. Be prepared for some water to spill out.
- Prepare the Water Supply Pipe (If Necessary): If the water supply pipe is damaged or corroded, you may need to cut it back to a clean section using a pipe cutter. Deburr the cut end of the pipe to ensure a smooth surface for the new valve.
- Install the New Valve: Connect the new shut off valve to the water supply pipe and the faucet supply line. Make sure the connections are tight, but don’t overtighten them.
- Turn On the Water Supply: Slowly turn on the main water supply and check for leaks around the new shut off valve. If you see any leaks, tighten the connections slightly.
- Test the Valve: Open and close the new shut off valve several times to ensure it is working properly.
Troubleshooting Common Shut Off Valve Problems
Even with proper installation and maintenance, shut off valves under the sink can sometimes develop problems. Here are some common issues and how to troubleshoot them:
- Leaking Valve: A leaking valve is a common problem that can be caused by a worn-out washer, a loose connection, or corrosion. Try tightening the connections first. If that doesn’t work, you may need to replace the washer or the entire valve.
- Stuck Valve: A valve that is difficult to turn or completely stuck may be corroded or have mineral buildup inside. Try lubricating the valve with a penetrating oil. If that doesn’t work, you may need to replace the valve.
- Dripping Faucet After Shut Off: A dripping faucet after you shut off the valve is usually caused by a worn-out cartridge or valve seat in the faucet itself, not the shut off valve. Replace the faucet cartridge or valve seat.
- Water Hammer: Water hammer is a banging noise in the pipes that occurs when you quickly shut off the water supply. This can be caused by a faulty shut off valve or a lack of air chambers in your plumbing system. Install water hammer arrestors to absorb the shock of the water.
Preventative Maintenance for Long-Lasting Valves
Regular maintenance can help extend the life of your shut off valves under the sink and prevent problems down the road. Here are some tips:
- Exercise the Valves Regularly: Turn the valves on and off a few times each year to prevent them from becoming stuck.
- Inspect for Leaks: Regularly check the valves for leaks and address any issues promptly.
- Clean the Valves: Remove any mineral buildup or corrosion from the valves with a wire brush or a descaling solution.
- Replace Worn Parts: Replace any worn-out washers or O-rings to prevent leaks.
The Economic and Environmental Impact of Functioning Shut Off Valves
Beyond the immediate benefits of preventing water damage and simplifying plumbing repairs, functioning shut off valves under the sink have a positive economic and environmental impact. By preventing leaks and allowing for timely repairs, they help conserve water, reducing your water bill and minimizing the strain on local water resources. Even small leaks can waste significant amounts of water over time, contributing to water scarcity and increasing the cost of water treatment.
Moreover, preventing water damage reduces the need for costly repairs, saving you money on plumbing bills, drywall replacement, and mold remediation. By taking proactive steps to maintain your shut off valves, you are not only protecting your home but also contributing to a more sustainable future.
Choosing Quality: A Deep Dive into Valve Materials and Construction
The longevity and reliability of a shut off valve under the sink are heavily influenced by the materials used in its construction. Understanding the properties of different materials can empower you to make informed decisions when selecting replacement valves. Brass is a popular choice due to its corrosion resistance and durability. Look for lead-free brass options to ensure water safety. Stainless steel offers excellent corrosion resistance and is a good choice for areas with hard water. Plastic valves, typically made of PVC or CPVC, are cost-effective and resistant to corrosion, but they may not be as durable as metal valves.
Examine the valve’s construction. A well-constructed valve will have smooth, precise threads and a solid, sturdy body. Avoid valves with rough edges, loose parts, or a flimsy feel. Pay attention to the valve’s pressure rating. Ensure that the valve is rated for the water pressure in your home to prevent leaks or failures. A higher pressure rating generally indicates a more robust and durable valve.
Expert Insights on Ensuring a Leak-Free Installation
While replacing a shut off valve under the sink is a DIY-friendly task, certain techniques can significantly improve the odds of a leak-free installation. Always use Teflon tape or pipe dope on threaded connections to create a watertight seal. Wrap the tape clockwise around the threads, overlapping each layer slightly. When tightening compression fittings, use two wrenches – one to hold the valve body and the other to tighten the nut. This will prevent the valve from twisting and damaging the connection. After tightening the connections, carefully inspect for any signs of leaks. Use a dry cloth to wipe the connections and then observe for any new moisture. If you detect a leak, gently tighten the connection until the leak stops. Avoid overtightening, as this can damage the valve or the pipes.
Navigating the World of Plumbing Codes and Regulations
Plumbing codes and regulations are in place to ensure the safety and efficiency of plumbing systems. While replacing a shut off valve under the sink is generally considered a minor repair, it’s essential to be aware of any relevant codes in your area. Local plumbing codes may specify the types of materials that can be used for shut off valves, the location of shut off valves, and the requirements for backflow prevention. Contact your local building department or a licensed plumber to inquire about specific plumbing codes in your area. Adhering to plumbing codes ensures that your plumbing system is safe, efficient, and compliant with local regulations.
Why Working Shut Off Valves are Essential for Homeowners
In conclusion, the shut off valve under the sink is a small but mighty component of your home’s plumbing system. Understanding its function, types, and maintenance will empower you to handle minor plumbing emergencies confidently and prevent costly water damage. Taking the time to inspect and maintain your shut off valves is a worthwhile investment that can save you time, money, and stress in the long run. Don’t underestimate the importance of this unassuming piece of plumbing hardware – it’s your first line of defense against water-related disasters.
