Stop the Drip: Expert Guide to Fixing a Leaking Kitchen Sink Sprayer
Is that incessant dripping from your kitchen sink sprayer driving you crazy and wasting water? A leaky kitchen sink sprayer is a common household nuisance, but it’s often a problem you can tackle yourself with the right knowledge and tools. This comprehensive guide will walk you through the steps to diagnose and fix a leaking sprayer, saving you money on plumbing bills and preventing potential water damage. We’ll cover everything from identifying the source of the leak to replacing worn-out parts, ensuring a long-lasting solution. Let’s get started!
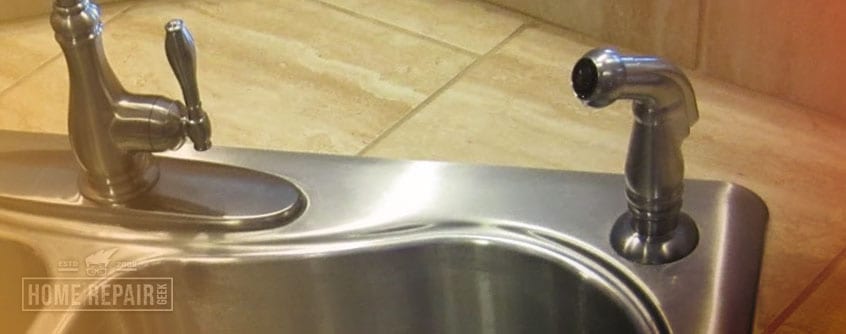
Understanding Why Your Kitchen Sink Sprayer Is Leaking
Before diving into repairs, it’s crucial to understand the common causes of a leaky kitchen sink sprayer. Identifying the culprit will help you choose the right fix and prevent future problems. Here are some of the most frequent reasons for sprayer leaks:
- Worn-Out O-Rings and Seals: These small rubber components create a watertight seal between the sprayer head, hose, and faucet body. Over time, they can dry out, crack, or become brittle, leading to leaks.
- Damaged Sprayer Head: The sprayer head itself can develop cracks or internal damage due to wear and tear or accidental impact.
- Loose Connections: The connections between the sprayer hose, faucet, and diverter valve can loosen over time, causing water to seep through.
- High Water Pressure: Excessive water pressure can put stress on the sprayer components, accelerating wear and tear and increasing the likelihood of leaks.
- Mineral Buildup: Hard water can leave mineral deposits that clog the sprayer head and interfere with the sealing surfaces.
- Faulty Diverter Valve: The diverter valve, located beneath the sink, directs water flow to either the faucet or the sprayer. If it malfunctions, it can cause leaks around the sprayer hose connection.
Essential Tools and Materials for Sprayer Repair
Having the right tools and materials on hand will make the repair process much smoother and more efficient. Here’s a basic checklist:
- Adjustable Wrench: For loosening and tightening connections.
- Screwdrivers (Phillips and Flathead): For removing screws and disassembling the sprayer head.
- Pliers: For gripping and manipulating small parts.
- Penetrating Oil: To loosen stubborn connections.
- New O-Rings and Seals: Purchase a variety pack or specific replacements for your sprayer model.
- New Sprayer Head (Optional): If the existing head is damaged beyond repair.
- Plumber’s Tape (Teflon Tape): To create a watertight seal on threaded connections.
- Bucket or Towels: To catch drips and protect your work area.
- Cleaning Supplies: To remove mineral buildup and grime.
Step-by-Step Guide to Diagnosing the Leak
Before you start taking things apart, it’s important to pinpoint the exact location of the leak. This will help you focus your efforts and avoid unnecessary repairs. Follow these steps:
- Dry the Area: Use a towel to thoroughly dry the area around the sprayer head, hose, and faucet base.
- Observe the Leak: Turn on the faucet and sprayer and carefully observe where the water is coming from. Is it dripping from the sprayer head, the hose connection, or the base of the faucet?
- Check the O-Rings: Examine the O-rings and seals for signs of wear, cracking, or damage.
- Inspect the Sprayer Head: Look for cracks or other damage to the sprayer head.
- Feel for Leaks: Run your finger along the sprayer hose and connections to feel for any moisture.
- Test the Diverter Valve: If you suspect the diverter valve is the problem, have someone activate the sprayer while you check for leaks around the valve under the sink.
Repairing a Leaky Sprayer Head
If the leak is coming from the sprayer head itself, you may be able to repair it by replacing the O-rings or cleaning out mineral deposits. Here’s how:
- Disassemble the Sprayer Head: Most sprayer heads can be disassembled by unscrewing or prying them apart. Refer to your sprayer’s instructions or search online for a diagram.
- Inspect and Replace O-Rings: Examine the O-rings and replace any that are damaged or worn. Apply a small amount of silicone grease to the new O-rings before installation.
- Clean Mineral Deposits: Soak the sprayer head components in a solution of vinegar and water to dissolve mineral buildup. Use a small brush or toothpick to remove stubborn deposits.
- Reassemble the Sprayer Head: Carefully reassemble the sprayer head, making sure all parts are properly aligned.
- Test for Leaks: Turn on the faucet and sprayer to check for leaks. If the leak persists, you may need to replace the entire sprayer head.
Tightening Loose Connections
Loose connections are a common cause of sprayer leaks. Tightening them can often solve the problem. Here’s how:
- Locate the Loose Connection: Identify the connection that is leaking. This could be at the sprayer head, the hose connection, or the faucet base.
- Tighten the Connection: Use an adjustable wrench to gently tighten the connection. Be careful not to overtighten, as this could damage the threads.
- Test for Leaks: Turn on the faucet and sprayer to check for leaks. If the leak persists, you may need to disassemble the connection and apply plumber’s tape.
Replacing the Sprayer Hose
If the sprayer hose is damaged or leaking, it will need to be replaced. Here’s how:
- Turn Off the Water Supply: Turn off the hot and cold water supply valves under the sink.
- Disconnect the Old Hose: Disconnect the old hose from the sprayer head and the faucet or diverter valve. You may need to use an adjustable wrench to loosen the connections.
- Install the New Hose: Connect the new hose to the sprayer head and the faucet or diverter valve. Make sure the connections are snug but not overtightened.
- Turn On the Water Supply: Turn on the water supply and check for leaks.
Addressing a Faulty Diverter Valve
A faulty diverter valve can cause leaks around the sprayer hose connection. Replacing the diverter valve is a more complex repair, but it’s often necessary to stop the leak. Here’s a simplified overview:
- Turn Off the Water Supply: As always, begin by shutting off the water supply.
- Disconnect the Water Lines: Disconnect the hot and cold water lines from the faucet.
- Remove the Faucet: Loosen the mounting nuts and remove the faucet from the sink.
- Replace the Diverter Valve: Access the diverter valve (usually located beneath the faucet body) and replace it with a new one. Follow the manufacturer’s instructions for your specific faucet model.
- Reinstall the Faucet: Reinstall the faucet on the sink and reconnect the water lines.
- Turn On the Water Supply: Turn on the water supply and check for leaks.
Important Note: Replacing a diverter valve can be challenging. If you’re not comfortable with plumbing repairs, it’s best to call a professional.
Preventive Measures to Avoid Future Leaks
Once you’ve fixed the leak, take steps to prevent future problems:
- Regularly Inspect Connections: Check the sprayer hose and connections periodically for any signs of leaks or looseness.
- Replace Worn O-Rings: Replace O-rings and seals as soon as they show signs of wear.
- Clean Mineral Deposits: Regularly clean the sprayer head to remove mineral buildup.
- Maintain Water Pressure: If your water pressure is excessively high, consider installing a pressure regulator.
- Use the Sprayer Gently: Avoid yanking or pulling on the sprayer hose, as this can damage the connections.
Choosing the Right Replacement Parts
When replacing parts, it’s crucial to choose the right ones for your sprayer model. Here are some tips:
- Identify Your Sprayer Model: Look for a model number on the sprayer head or faucet body.
- Consult the Manufacturer’s Website: The manufacturer’s website is a great resource for finding replacement parts and diagrams.
- Visit a Plumbing Supply Store: A plumbing supply store can help you find the right parts and offer expert advice.
- Consider Universal Replacement Parts: Some universal replacement parts are designed to fit a variety of sprayer models.
Troubleshooting Common Sprayer Problems
Even after following these steps, you may encounter other issues. Here are some common problems and their solutions:
- Low Water Pressure: Check for clogs in the sprayer head or hose. Clean or replace the affected parts.
- Sprayer Stays On: The diverter valve may be stuck. Try lubricating it with penetrating oil or replace it.
- Hose Kinks: Replace the hose with a new one that is more flexible.
Is it Time to Replace the Entire Faucet?
Sometimes, a leaky sprayer is a sign of a larger problem with the faucet itself. If your faucet is old, corroded, or constantly giving you trouble, it may be time to replace it. Replacing the entire faucet can be a more cost-effective solution in the long run, as it eliminates the risk of future leaks and improves the overall functionality of your kitchen sink.
Expert Tips for a Leak-Free Kitchen
Maintaining a leak-free kitchen involves more than just fixing problems as they arise. Here are some expert tips to keep your plumbing in top shape:
- Regularly Check for Leaks: Make it a habit to inspect your faucets, pipes, and appliances for any signs of leaks.
- Address Leaks Promptly: Don’t ignore small leaks. They can quickly turn into larger problems and cause significant water damage.
- Use Quality Plumbing Materials: When making repairs or installations, use high-quality plumbing materials that are designed to last.
- Consider a Water Leak Detector: A water leak detector can alert you to leaks before they cause serious damage.
Putting an End to the Drip
Fixing a sprayer on kitchen sink leaking doesn’t have to be a daunting task. By understanding the common causes of leaks, having the right tools, and following these step-by-step instructions, you can often resolve the issue yourself. Remember to prioritize safety by turning off the water supply before starting any repairs. If you’re not comfortable with plumbing repairs, don’t hesitate to call a qualified plumber. Taking proactive steps to maintain your plumbing system can save you money and prevent costly water damage in the long run. Share your experiences with fixing your kitchen sink sprayer in the comments below!
