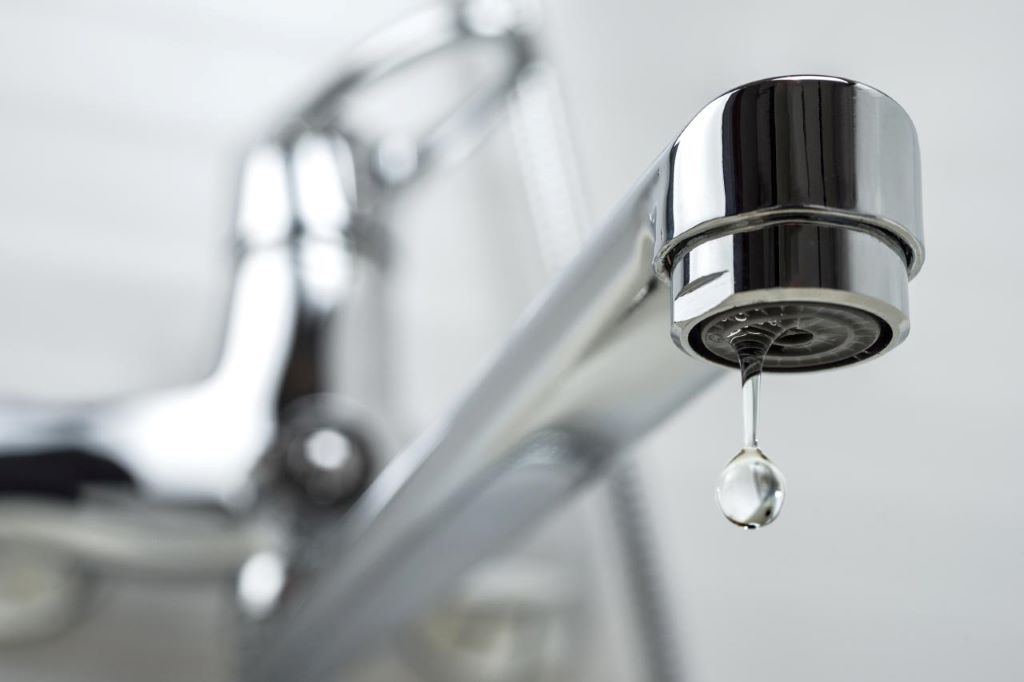
Silence the Drip: Expert Guide on How to Fix a Leaky Faucet in Your Kitchen
That incessant drip, drip, drip emanating from your kitchen sink isn’t just annoying; it’s a waste of water and money. A leaky faucet can quickly escalate into a costly problem, not to mention the constant irritation it causes. Fortunately, learning how to fix a leaky faucet in the kitchen is a common DIY project achievable for most homeowners with a few basic tools and a bit of patience. This comprehensive guide provides step-by-step instructions, expert tips, and troubleshooting advice to help you tackle this plumbing challenge like a pro, saving you money and restoring peace and quiet to your kitchen. We’ll cover everything from diagnosing the type of leak to replacing worn-out parts, ensuring a successful and long-lasting repair.
Understanding the Anatomy of a Kitchen Faucet
Before diving into the repair process, it’s essential to understand the different types of kitchen faucets and their components. Faucets generally fall into four main categories:
- Compression Faucets: These are the oldest type and easily identifiable by their two separate handles for hot and cold water. They use washers that compress against the valve seat to stop the flow of water.
- Ball Faucets: Characterized by a single handle that controls both water flow and temperature, ball faucets use a ball valve with slots and chambers to regulate water.
- Cartridge Faucets: Similar to ball faucets, cartridge faucets also have a single handle. However, they use a cartridge with O-rings to control water flow.
- Ceramic Disc Faucets: These are the most modern and durable type, featuring a single lever and ceramic discs that slide over each other to control water flow.
Each type has its own set of components, but common parts include handles, spouts, O-rings, washers, cartridges, and valve seats. Identifying the type of faucet you have is the first step in determining the cause of the leak and the necessary repairs.
Essential Tools and Materials for Faucet Repair
Gathering the right tools and materials beforehand will make the repair process much smoother. Here’s a list of essentials:
- Adjustable Wrench: For loosening and tightening nuts and bolts.
- Screwdrivers (Phillips and Flathead): To remove handles and access internal components.
- Pliers: For gripping and manipulating small parts.
- Penetrating Oil: To loosen corroded or stuck parts.
- Plumber’s Grease: To lubricate O-rings and cartridges for smooth operation.
- Replacement Parts: New O-rings, washers, cartridges, or valve seats, depending on the type of faucet and the cause of the leak. Having a faucet repair kit on hand is a good idea.
- Basin Wrench: Useful for removing the faucet from the sink if necessary.
- Clean Cloths or Sponges: To clean up spills and dry parts.
- Bucket: To catch any remaining water in the pipes.
- Safety Glasses: To protect your eyes from debris.
Before starting any repair, always turn off the water supply to the faucet. This is usually done by closing the shut-off valves located under the sink. If you can’t find shut-off valves, you may need to turn off the main water supply to your house.
Step-by-Step Guide to Fixing a Leaky Compression Faucet
Compression faucets are among the most common and easiest to repair. Here’s how to fix a leaky one:
- Turn off the water supply: As mentioned earlier, locate and close the shut-off valves under the sink.
- Remove the handle: Use a screwdriver to remove the screw holding the handle in place. Some handles may have a decorative cap that needs to be pried off first.
- Loosen the packing nut: Use an adjustable wrench to loosen the packing nut that holds the stem in place.
- Remove the stem: Carefully pull out the stem. You may need to wiggle it a bit to loosen it.
- Replace the washer: At the bottom of the stem, you’ll find a rubber washer. This is the most common culprit for leaks in compression faucets. Remove the old washer and replace it with a new one of the same size and type.
- Inspect the valve seat: The valve seat is the part that the washer presses against to stop the flow of water. If it’s corroded or damaged, it can also cause leaks. You can use a valve seat wrench to remove and replace it, or you can try cleaning it with a valve seat dressing tool.
- Reassemble the faucet: Put the stem back into the faucet body, tighten the packing nut, and reattach the handle.
- Turn on the water supply: Slowly turn on the water and check for leaks. If the faucet still leaks, double-check that the washer is properly seated and the packing nut is tight.
Repairing a Leaky Ball Faucet: A Detailed Walkthrough
Ball faucets can be slightly more complex to repair due to their intricate design. Here’s a step-by-step guide:
- Shut off the water supply: Ensure both hot and cold water supplies are turned off.
- Loosen the setscrew: Locate the setscrew on the side of the handle and loosen it with an Allen wrench.
- Remove the handle: Pull the handle straight up and off the faucet body.
- Loosen the cap and collar: Use an adjustable wrench to loosen the cap and collar that hold the ball valve in place.
- Remove the ball valve: Carefully lift the ball valve out of the faucet body.
- Inspect the O-rings and springs: Underneath the ball valve, you’ll find O-rings and springs. These are common wear points and often the cause of leaks. Replace any worn or damaged O-rings and springs with new ones.
- Inspect the valve seats: Check the valve seats for any signs of damage or corrosion. If necessary, replace them with new ones.
- Reassemble the faucet: Place the new springs and O-rings in their proper positions, then reinsert the ball valve. Tighten the cap and collar, reattach the handle, and tighten the setscrew.
- Turn on the water supply: Slowly turn on the water and check for leaks. If the faucet still leaks, double-check that the O-rings are properly seated and the cap and collar are tight.
Fixing a Leaky Cartridge Faucet: An Expert’s Approach
Cartridge faucets are relatively easy to repair, as the cartridge is a single, replaceable unit. Here’s how to fix a leaky one:
- Turn off the water supply: As always, start by shutting off the water.
- Remove the handle: Depending on the model, you may need to pry off a decorative cap to access the handle screw. Remove the screw and pull the handle off.
- Remove the retaining clip: Use pliers to remove the retaining clip that holds the cartridge in place.
- Pull out the cartridge: Grasp the cartridge firmly and pull it straight up and out of the faucet body. You may need to wiggle it a bit to loosen it.
- Replace the cartridge: Insert the new cartridge into the faucet body, making sure it’s properly aligned.
- Reinstall the retaining clip: Secure the cartridge by reinstalling the retaining clip.
- Reattach the handle: Put the handle back on and tighten the screw.
- Turn on the water supply: Slowly turn on the water and check for leaks.
Addressing Leaks in Ceramic Disc Faucets: A Professional Guide
Ceramic disc faucets are generally very durable, but they can still develop leaks over time. Here’s how to address them:
- Turn off the water supply: Always the first step.
- Remove the handle: Similar to other faucets, you’ll need to remove the handle screw, often hidden under a decorative cap.
- Remove the escutcheon cap: This cap covers the ceramic disc cylinder. You may need to unscrew it or pry it off.
- Remove the ceramic disc cylinder: Carefully lift the cylinder out of the faucet body.
- Inspect the O-rings and seals: The most common cause of leaks in ceramic disc faucets is worn O-rings and seals. Replace any damaged or worn parts.
- Clean the ceramic discs: Use a soft cloth to clean the ceramic discs. Any debris or mineral buildup can cause leaks.
- Reassemble the faucet: Put the ceramic disc cylinder back into the faucet body, reinstall the escutcheon cap, and reattach the handle.
- Turn on the water supply: Slowly turn on the water and check for leaks.
Troubleshooting Common Faucet Problems
Sometimes, fixing a leaky faucet isn’t as straightforward as replacing a washer or O-ring. Here are some common problems and how to troubleshoot them:
- Low Water Pressure: This could be caused by mineral buildup in the aerator or the faucet body. Clean the aerator and flush the faucet body with water to remove any debris.
- Stiff Handle: This is often caused by mineral buildup or corrosion. Apply penetrating oil to the handle and stem to loosen them. You may also need to disassemble the faucet and clean the parts thoroughly.
- Noisy Faucet: This could be caused by loose parts or high water pressure. Tighten any loose parts and install a water pressure regulator to reduce the water pressure.
- Dripping from the Spout: This is usually caused by a worn washer, O-ring, or cartridge. Replace the worn part with a new one.
Preventing Future Leaks: Proactive Maintenance Tips
Preventing leaks is always better than fixing them. Here are some tips to keep your kitchen faucet in good working order:
- Regularly Inspect Your Faucet: Check for any signs of leaks or corrosion. Address any problems promptly before they escalate.
- Clean Your Faucet Regularly: Use a mild soap and water solution to clean your faucet. Avoid using abrasive cleaners, as they can damage the finish.
- Lubricate Moving Parts: Apply plumber’s grease to O-rings and cartridges to keep them lubricated and prevent them from drying out.
- Replace Worn Parts Promptly: Don’t wait until a part fails completely. Replace worn washers, O-rings, and cartridges as soon as you notice any signs of wear.
- Install a Water Softener: Hard water can cause mineral buildup, which can damage your faucet. Installing a water softener can help prevent this problem.
Choosing the Right Replacement Parts: A Buyer’s Guide
When replacing faucet parts, it’s crucial to choose the right ones. Here are some tips:
- Identify the Faucet Type: Knowing the type of faucet you have is essential for selecting the correct replacement parts.
- Check the Manufacturer’s Specifications: Consult the manufacturer’s website or documentation to find the exact part numbers for your faucet.
- Bring the Old Part with You: When purchasing replacement parts, bring the old part with you to ensure a proper match.
- Choose High-Quality Parts: Opt for high-quality replacement parts from reputable brands. They may cost a bit more, but they’ll last longer and provide better performance.
- Consider a Faucet Repair Kit: A faucet repair kit typically includes a variety of common replacement parts, making it a convenient option for tackling multiple repairs.
Knowing When to Call a Professional Plumber
While many faucet repairs are DIY-friendly, some situations warrant calling a professional plumber. Consider seeking professional help if:
- You’re uncomfortable working with plumbing: If you’re not confident in your DIY skills, it’s best to leave the repair to a professional.
- You can’t identify the source of the leak: If you’ve tried troubleshooting and still can’t figure out where the leak is coming from, a plumber can diagnose the problem and provide a solution.
- You encounter stripped screws or corroded parts: These can be difficult to remove without damaging the faucet or pipes.
- You have persistent leaks despite replacing parts: This could indicate a more serious plumbing problem that requires professional attention.
- You’re dealing with a complex faucet system: Some modern faucets have complex systems that are best left to professionals.
Concluding Thoughts: A Drip-Free Kitchen is Within Reach
Fixing a leaky faucet in the kitchen is a manageable task that can save you money and water. By understanding the different types of faucets, gathering the right tools, and following our step-by-step guides, you can confidently tackle this DIY project. Remember to always turn off the water supply before starting any repair and to choose high-quality replacement parts. With a little patience and effort, you can silence that annoying drip and enjoy a drip-free kitchen. Don’t hesitate to share your experiences with DIY faucet repair in the comments below – your insights could help fellow homeowners!
