Mastering the Ruger 22/45 Lite Disassembly: A Comprehensive Guide
So, you’re looking to disassemble your Ruger 22/45 Lite? Whether it’s for routine cleaning, maintenance, or troubleshooting, understanding the disassembly process is crucial for any owner of this popular rimfire pistol. This guide provides a comprehensive, step-by-step walkthrough of the Ruger 22/45 Lite disassembly, ensuring you can confidently and safely maintain your firearm. We’ll delve into the nuances of each step, offering insights and tips that go beyond the basic instructions, making this a valuable resource for both novice and experienced gun owners. By the end of this article, you’ll possess the knowledge and confidence to perform a complete demontage ruger 22/45 lite, ensuring its optimal performance and longevity.
Understanding the Ruger 22/45 Lite: A Foundation for Disassembly
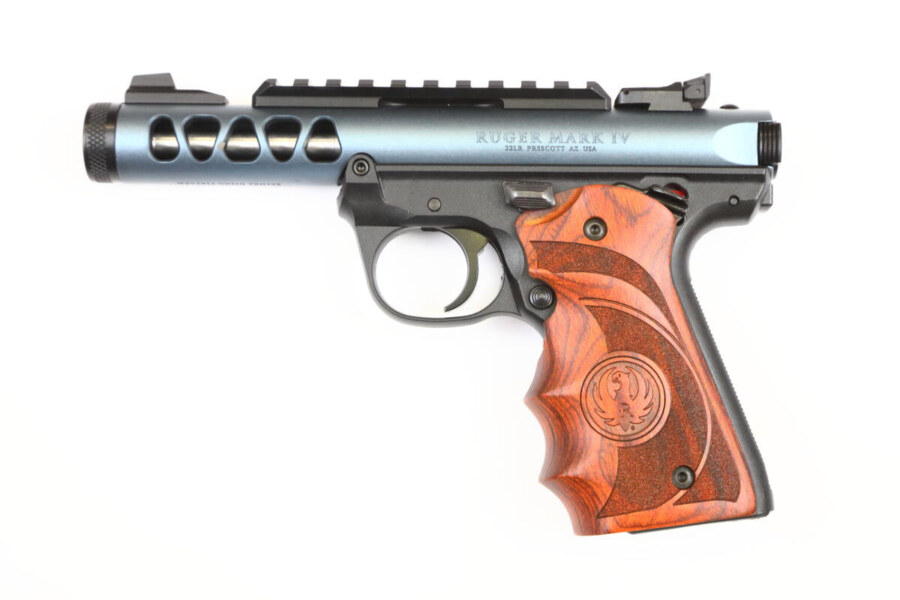
The Ruger 22/45 Lite is a renowned .22 caliber pistol, celebrated for its accuracy, lightweight design, and comfortable grip angle that mirrors the classic 1911. Its popularity stems from its suitability for various applications, including target shooting, plinking, and training. The “Lite” designation refers to its aluminum receiver, which significantly reduces its weight compared to the standard 22/45 models. Understanding the fundamental design and components of the 22/45 Lite is paramount before attempting any disassembly. Familiarizing yourself with the pistol’s anatomy will not only make the disassembly process smoother but also enhance your overall understanding of its operation. This knowledge is the bedrock of confident and safe gun ownership.
The Ruger 22/45 series evolved from the original Ruger Standard pistol, incorporating features favored by competitive shooters and recreational plinkers alike. The 22/45 grip angle, mimicking the 1911, provides a familiar and comfortable feel for many shooters. The “Lite” version further enhances the appeal with its reduced weight, making it an ideal choice for extended shooting sessions. The design incorporates a simple blowback action, contributing to its reliability and ease of maintenance.
Essential Tools and Safety Precautions for Ruger 22/45 Lite Disassembly
Before embarking on the disassembly of your Ruger 22/45 Lite, gathering the necessary tools and understanding crucial safety precautions is paramount. Working on any firearm requires meticulous attention to detail and a commitment to safety to prevent accidental discharge or damage to the pistol.
- Essential Tools: A basic toolkit should include:
- Screwdrivers: A set of screwdrivers with various sizes, including a properly sized screwdriver to avoid damaging screw heads.
- Punch Set: A set of roll pin punches for removing pins without causing damage.
- Hammer: A small gunsmithing hammer for tapping punches.
- Cleaning Supplies: Cleaning solvent, brushes, and patches for cleaning components during disassembly.
- Work Mat: A clean, well-lit workspace with a gun mat to protect the pistol and prevent parts from getting lost.
Safety Precautions:
- Unload the Firearm: Always ensure the pistol is completely unloaded before commencing any disassembly. Remove the magazine and visually inspect the chamber to verify it’s empty.
- Safe Direction: Point the firearm in a safe direction during the entire disassembly process.
- Eye Protection: Wear safety glasses to protect your eyes from any flying debris or springs.
- Follow Instructions: Adhere to the disassembly steps outlined in this guide or the Ruger owner’s manual.
- Proper Storage: Store disassembled components in an organized manner to prevent loss and facilitate reassembly.
Step-by-Step Guide to Ruger 22/45 Lite Disassembly
Now, let’s proceed with the detailed disassembly process of your Ruger 22/45 Lite. Follow these steps carefully, paying close attention to each instruction to ensure a safe and successful demontage ruger 22/45 lite.
- Magazine Removal: Press the magazine release button and remove the magazine. Visually inspect the chamber to ensure it’s empty.
- Field Stripping:
- Ensure the pistol is unloaded and pointed in a safe direction.
- Pull the trigger to release the hammer.
- Lock the bolt back.
- Push the mainspring housing latch forward and remove the mainspring housing.
- Release the bolt and remove it from the receiver.
- Bolt Disassembly:
- Remove the firing pin retaining pin using a punch.
- Carefully remove the firing pin and extractor.
- Clean and inspect the bolt components.
- Detailed Receiver Disassembly (Optional): This step is generally not required for routine cleaning but may be necessary for more thorough maintenance.
- Remove the grips.
- Remove the hammer strut and disconnect the hammer.
- Carefully remove other internal components, noting their positions for reassembly.
Important Note: Detailed receiver disassembly should only be attempted by experienced individuals or gunsmiths due to the complexity of the internal components. Incorrect disassembly or reassembly can lead to malfunctions or damage to the pistol.
Advanced Disassembly Techniques and Considerations
Beyond the basic disassembly steps, several advanced techniques and considerations can enhance your understanding and maintenance of the Ruger 22/45 Lite.
- Trigger Group Maintenance: The trigger group is a critical component of the pistol’s operation. Periodically cleaning and lubricating the trigger group can improve trigger pull and overall performance.
- Extractor Maintenance: The extractor is responsible for removing spent casings from the chamber. Ensure it’s clean and free from debris to prevent malfunctions.
- Firing Pin Inspection: Inspect the firing pin for any signs of damage or wear. A damaged firing pin can cause misfires.
- Lubrication: Proper lubrication is essential for smooth operation and preventing wear. Use a high-quality gun lubricant on all moving parts.
Common Pitfalls to Avoid During Disassembly
Even with careful attention, certain pitfalls can arise during the disassembly process. Being aware of these potential issues can help you avoid them and ensure a smooth experience.
- Forcing Components: Never force any component during disassembly. If a part is not moving freely, double-check the instructions and ensure you’re using the correct technique.
- Damaging Screw Heads: Use properly sized screwdrivers to avoid damaging screw heads. Damaged screw heads can make future disassembly difficult.
- Losing Small Parts: Small parts, such as springs and pins, can easily get lost. Work in a clean, organized workspace and use a parts tray to prevent loss.
- Incorrect Reassembly: Incorrect reassembly can lead to malfunctions or damage to the pistol. Refer to the disassembly guide and ensure all components are properly positioned.
The Importance of Regular Cleaning and Maintenance
Regular cleaning and maintenance are crucial for preserving the accuracy, reliability, and longevity of your Ruger 22/45 Lite. A clean firearm operates more efficiently and is less prone to malfunctions. After each shooting session, disassemble the pistol and clean the barrel, bolt, and receiver. Apply a light coat of lubricant to all moving parts to prevent corrosion and ensure smooth operation.
Troubleshooting Common Issues After Disassembly
Even after careful disassembly and reassembly, you might encounter certain issues. Here’s a guide to troubleshooting common problems:
- Failure to Extract: This can be caused by a dirty extractor, a worn extractor spring, or a dirty chamber. Clean the extractor and chamber thoroughly. If the problem persists, replace the extractor spring.
- Failure to Eject: This can be caused by a weak ejector spring or a dirty ejector. Clean the ejector and replace the spring if necessary.
- Misfires: This can be caused by a dirty firing pin, a weak firing pin spring, or damaged ammunition. Clean the firing pin and replace the spring if necessary. Ensure you are using high-quality ammunition.
- Failure to Feed: This can be caused by a dirty magazine, a weak magazine spring, or damaged ammunition. Clean the magazine and replace the spring if necessary.
Ruger 22/45 Lite Accessories and Upgrades
The Ruger 22/45 Lite is a highly customizable pistol, with a wide range of accessories and upgrades available to enhance its performance and aesthetics.
- Red Dot Sights: Red dot sights can improve accuracy and target acquisition speed.
- Grips: Aftermarket grips can provide a more comfortable and secure grip.
- Triggers: Upgraded triggers can offer a lighter and smoother trigger pull.
- Compensators: Compensators can reduce muzzle rise and improve control.
- Magazines: High-capacity magazines can increase shooting time between reloads.
Expert Insights on Maintaining Peak Performance
Maintaining peak performance of your Ruger 22/45 Lite involves more than just cleaning and disassembly. It requires a deep understanding of the pistol’s mechanics and a commitment to proactive maintenance. Regularly inspect all components for wear and tear. Replace worn parts promptly to prevent malfunctions. Use high-quality ammunition to ensure reliable operation. Practice proper shooting techniques to improve accuracy and control. By following these expert insights, you can ensure your Ruger 22/45 Lite performs at its best for years to come.
Ensuring Longevity and Reliability
Mastering the demontage ruger 22/45 lite is an investment in the longevity and reliability of your firearm. This comprehensive guide has provided you with the knowledge and skills necessary to safely and effectively disassemble, clean, and maintain your Ruger 22/45 Lite. Remember to prioritize safety, follow the instructions carefully, and use the appropriate tools. By incorporating these practices into your routine, you’ll not only extend the life of your pistol but also enhance your shooting experience. Now you are equipped to keep your Ruger 22/45 Lite in top condition for years of enjoyable shooting.
