How to Fix a Leaky Hose at the Bottom of Your Kitchen Tap: A Comprehensive Guide
Is your kitchen tap dripping incessantly, the culprit being a leaky hose connection at the bottom? That constant drip, drip, drip is not only annoying but also wastes water and can potentially damage your cabinets. You’ve landed in the right place. This comprehensive guide will walk you through the process of how yo fix hose yo bottom of kitchen tap, providing you with the knowledge and confidence to tackle this common plumbing problem yourself. We’ll cover everything from identifying the leak to replacing the hose, ensuring a watertight seal. Our aim is to provide a resource that is both accessible to the DIY enthusiast and informative for those seeking a deeper understanding of kitchen tap mechanics.
Understanding the Anatomy of Your Kitchen Tap and Hose Connections
Before diving into the repair, it’s crucial to understand the components involved. Kitchen taps, while varying in style, generally consist of a spout, handle(s), valve cartridge(s), and flexible hoses that connect to your water supply. The hoses, usually made of braided stainless steel or reinforced plastic, are connected to the tap body and the shut-off valves under the sink using compression fittings or threaded connections. Leaks often occur at these connection points due to wear and tear, corrosion, or improper installation.
Familiarizing yourself with these parts will make the repair process much smoother. Understanding the function of each component allows for a more targeted approach to diagnosing and fixing the problem. We’ve found that many leaks originate from the flexible hose itself degrading over time, especially in areas with hard water.
Identifying the Source of the Leak: A Step-by-Step Diagnostic
Pinpointing the exact location of the leak is the first and most important step. Follow these steps to accurately identify the source:
- Dry the Area: Use a clean cloth or paper towel to thoroughly dry the area under the sink, around the tap connections, and along the length of the hose. This will make it easier to see where the water is actively leaking from.
- Turn on the Tap: Slowly turn on the tap, both hot and cold, and observe closely. Look for drips or trickles forming at the hose connections, along the hose itself, or where the hose connects to the tap body.
- Feel for Moisture: If you can’t visually identify the leak, run your finger along the hose and around the connections. Moisture on your finger will indicate the source of the leak.
- Check the Compression Fittings: Pay close attention to the compression fittings at both ends of the hose. These are common points of failure. Look for signs of corrosion or mineral buildup, which can indicate a leak.
- Inspect the Hose: Carefully examine the hose itself for any signs of damage, such as cracks, bulges, or kinks. These can weaken the hose and cause it to leak.
Sometimes, the leak might be subtle, only appearing after the tap has been running for a while. Be patient and thorough in your inspection. Accurate diagnosis is key to a successful repair.
Tools and Materials You’ll Need to Fix a Leaky Hose
Before you begin, gather the necessary tools and materials. Having everything on hand will make the job easier and prevent unnecessary trips to the hardware store.
- Adjustable Wrench: Essential for loosening and tightening the hose connections.
- Basin Wrench (Optional): Useful for reaching tight spaces under the sink.
- Screwdriver (Phillips and Flathead): Depending on your tap model, you may need a screwdriver to remove parts.
- New Kitchen Tap Hose: Purchase a replacement hose that is the correct length and fitting size for your tap. Take the old hose with you to the hardware store to ensure a proper match.
- Plumber’s Tape (Teflon Tape): Used to create a watertight seal on threaded connections.
- Bucket or Bowl: To catch any water that may spill during the repair.
- Towels or Rags: To clean up spills and dry the area.
- Gloves: To protect your hands.
- Safety Glasses: To protect your eyes from debris.
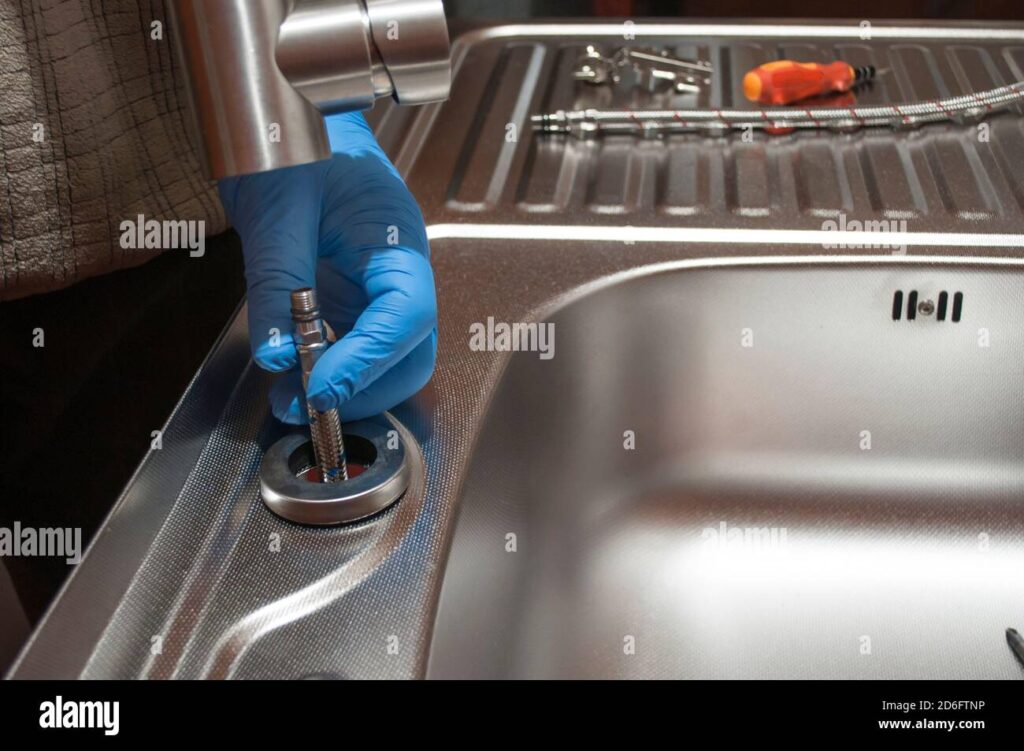
Step-by-Step Guide: Replacing the Leaky Kitchen Tap Hose
Now that you’ve identified the leak and gathered your tools, it’s time to replace the hose. Follow these steps carefully:
- Turn Off the Water Supply: Locate the shut-off valves under the sink for both hot and cold water. Turn them clockwise until they are completely closed. This is a crucial step to prevent flooding.
- Relieve Water Pressure: Turn on the kitchen tap to release any remaining water pressure in the lines. This will minimize spillage when you disconnect the hose.
- Place a Bucket Under the Sink: Position a bucket or bowl under the hose connections to catch any water that may drip out.
- Disconnect the Old Hose: Use an adjustable wrench to loosen the compression fittings at both ends of the hose. Turn the wrench counterclockwise. Be prepared for some water to spill out.
- Remove the Old Hose: Once the fittings are loose, carefully remove the old hose from the tap and the shut-off valve.
- Prepare the New Hose: Inspect the new hose to ensure it is the correct length and has the proper fittings. If the connections are threaded, wrap them with plumber’s tape (Teflon tape) to create a watertight seal. Wrap the tape in a clockwise direction, overlapping each layer slightly.
- Connect the New Hose: Attach the new hose to the tap and the shut-off valve. Tighten the compression fittings with an adjustable wrench. Be careful not to overtighten, as this can damage the fittings. Snug is good.
- Turn on the Water Supply: Slowly turn on the shut-off valves, one at a time.
- Check for Leaks: Carefully inspect the hose connections for any signs of leaks. If you see any leaks, tighten the fittings slightly. If the leak persists, you may need to re-wrap the threads with plumber’s tape or replace the fitting.
- Test the Tap: Turn on the tap and check for proper water flow. Make sure there are no leaks around the base of the tap or along the hose.
If you encounter any difficulties during the repair, don’t hesitate to consult a professional plumber. It’s always better to be safe than sorry, especially when dealing with water lines.
Troubleshooting Common Issues When Fixing a Leaky Hose
Even with careful attention, you might encounter some common issues during the repair process. Here’s how to troubleshoot them:
- Stubborn Fittings: If the compression fittings are difficult to loosen, try applying penetrating oil or heat (using a heat gun on a low setting) to the fittings. Let the oil soak in for a few minutes before attempting to loosen the fittings again.
- Dripping After Replacement: If the hose is still dripping after replacement, double-check the tightness of the fittings. Make sure the threads are properly wrapped with plumber’s tape. If the dripping persists, the fitting itself may be damaged and need to be replaced.
- Incorrect Hose Size: Ensure that the new hose is the correct size and has the proper fittings for your tap and shut-off valve. Using the wrong size hose can lead to leaks and damage.
- Damaged Shut-Off Valve: If the shut-off valve is leaking or not shutting off the water completely, it may need to be replaced. This is a more complex repair that may require the assistance of a plumber.
Preventative Measures to Extend the Life of Your Kitchen Tap Hose
Taking preventative measures can help extend the life of your kitchen tap hose and prevent future leaks:
- Regular Inspections: Periodically inspect the hose and connections for any signs of wear and tear, corrosion, or leaks.
- Proper Installation: Ensure that the hose is properly installed and that the fittings are tightened correctly.
- Avoid Over-Tightening: Over-tightening the fittings can damage the hose and connections. Snug is sufficient.
- Use Quality Hoses: Invest in high-quality hoses made of durable materials.
- Protect from Freezing: In cold climates, protect the pipes and hoses from freezing by insulating them.
The Importance of Using Quality Replacement Parts
When it comes to plumbing repairs, using quality replacement parts is essential. Cheap, low-quality hoses and fittings are more likely to fail prematurely, leading to leaks and potential water damage. Invest in reputable brands and materials that are designed to withstand the rigors of daily use. Stainless steel braided hoses, for example, are more durable and resistant to corrosion than plastic hoses. Using quality parts is an investment in the long-term reliability of your plumbing system.
Professional Plumber vs. DIY: When to Call for Help
While fixing a leaky kitchen tap hose is a relatively simple DIY project, there are times when it’s best to call a professional plumber. If you’re uncomfortable working with plumbing, if you encounter any complex issues, or if you’re unsure about any part of the process, don’t hesitate to seek professional assistance. A plumber has the expertise and tools to diagnose and repair plumbing problems safely and effectively. Attempting to fix a problem beyond your skill level can lead to further damage and costly repairs.
Why Proper Kitchen Tap Maintenance Matters
Beyond addressing immediate leaks, regular kitchen tap maintenance plays a vital role in preserving your home’s plumbing system and conserving water. Over time, mineral deposits and corrosion can accumulate within the tap and hose, leading to reduced water flow and potential leaks. By periodically inspecting and cleaning your kitchen tap, you can prevent these issues and extend the life of your plumbing fixtures. Simple maintenance tasks, such as cleaning the aerator and tightening loose connections, can make a significant difference in the long run.
Expert Advice on Selecting the Right Replacement Hose
Choosing the right replacement hose is crucial for a successful repair. When selecting a new hose, consider the following factors:
- Length: Measure the length of the old hose to ensure that the new hose is the same length.
- Fitting Size: Identify the fitting size of the old hose and purchase a new hose with the same fitting size.
- Material: Choose a hose made of durable materials, such as stainless steel or reinforced plastic.
- Brand: Select a reputable brand known for producing high-quality plumbing products.
- Certifications: Look for hoses that are certified by recognized plumbing organizations.
Taking the time to select the right replacement hose will ensure a proper fit and a long-lasting repair.
Ensuring a Watertight Seal: Tips and Tricks
Creating a watertight seal is essential to prevent future leaks. Here are some tips and tricks to ensure a leak-free connection:
- Use Plumber’s Tape: Wrap threaded connections with plumber’s tape (Teflon tape) to create a watertight seal.
- Tighten Fittings Properly: Tighten the fittings with an adjustable wrench, but be careful not to overtighten.
- Check for Leaks: After connecting the hose, turn on the water supply and check for leaks.
- Use a Basin Wrench: A basin wrench can be helpful for reaching tight spaces under the sink.
- Consider a Sealing Compound: For extra security, consider using a pipe sealing compound on the threads.
The Long-Term Benefits of a Leak-Free Kitchen Tap
Beyond the immediate relief of stopping a dripping tap, fixing a leaky hose at the bottom of your kitchen tap offers numerous long-term benefits. A leak-free tap conserves water, saves money on your water bill, and prevents potential water damage to your cabinets and flooring. It also eliminates the annoying sound of dripping water, creating a more peaceful and relaxing kitchen environment. By taking the time to fix a leaky tap, you’re investing in the long-term health and value of your home.
What You’ve Learned About Fixing Your Kitchen Tap Hose
Fixing a leaky hose at the bottom of your kitchen tap is a manageable DIY project that can save you money and prevent water damage. By following the steps outlined in this guide, you can confidently tackle this common plumbing problem. Remember to turn off the water supply, identify the source of the leak, gather the necessary tools and materials, and carefully replace the hose. With a little patience and attention to detail, you can restore your kitchen tap to its leak-free glory. If you found this guide helpful, consider sharing it with others who might benefit from this knowledge. And if you’ve tackled this repair yourself, share your experiences in the comments below!
