How to Fix a Leaky Faucet in the Kitchen: Easy DIY Solutions
Is that annoying drip, drip, drip from your kitchen faucet driving you crazy and wasting water? A leaky faucet isn’t just a nuisance; it can lead to higher water bills and potential water damage over time. The good news is that most leaky kitchen faucets can be fixed with some basic DIY skills and a few inexpensive tools. This comprehensive guide will walk you through the entire process of how to fix a leaky faucet in the kitchen with easy diy solutions, from identifying the type of faucet you have to replacing worn-out parts. We’ll provide step-by-step instructions, expert tips, and troubleshooting advice to help you successfully tackle this common plumbing problem and save money in the process. Our goal is to empower you with the knowledge and confidence to fix your leaky faucet like a pro, ensuring a drip-free kitchen sink for years to come.
Understanding the Anatomy of Your Kitchen Faucet
Before diving into repairs, it’s essential to understand the different types of kitchen faucets and their components. Familiarizing yourself with the faucet’s anatomy will make diagnosing the leak and finding the right replacement parts much easier. Here’s a breakdown of the most common kitchen faucet types:
- Compression Faucets: These are the oldest and simplest type, characterized by two separate handles for hot and cold water. They use rubber washers that compress against the valve seat to stop the flow of water. Leaks in compression faucets are often caused by worn-out washers.
- Ball Faucets: Identified by a single handle that controls both water flow and temperature, ball faucets use a ball valve with slots and chambers to regulate water flow. Leaks in these faucets are typically due to worn-out O-rings and seals.
- Cartridge Faucets: Similar to ball faucets, cartridge faucets also have a single handle. However, they use a cartridge, a self-contained unit that controls water flow and temperature. Leaks in cartridge faucets are often caused by a faulty or damaged cartridge.
- Ceramic Disc Faucets: These are the most modern and durable type of faucet. They feature a single lever handle and use two ceramic discs that slide over each other to control water flow. Leaks in ceramic disc faucets are less common but can occur due to damaged ceramic discs or seals.
Once you’ve identified your faucet type, take a closer look at its individual parts. Common components include:
- Handles: Used to control water flow and temperature.
- Spout: The curved or angled part of the faucet that delivers water into the sink.
- Aerator: A screen-like device at the end of the spout that mixes air with water to create a smooth, splash-free flow.
- Valve Stem: The component that connects the handle to the valve seat or cartridge.
- O-Rings and Seals: Rubber or silicone rings that create a watertight seal between different parts of the faucet.
- Washers: Rubber discs used in compression faucets to seal the valve seat.
- Cartridge or Ball Valve: The internal component that controls water flow in cartridge and ball faucets.
Tools and Materials You’ll Need to Fix a Leaky Faucet
Before you start any repairs, gather the necessary tools and materials. Having everything on hand will make the process smoother and prevent unnecessary trips to the hardware store. Here’s a list of essential items:
- Adjustable Wrench: For loosening and tightening nuts and bolts.
- Screwdrivers: Both Phillips and flathead screwdrivers are needed for removing screws.
- Pliers: For gripping and manipulating small parts.
- Allen Wrench Set: For removing set screws on some faucet handles.
- Basin Wrench: For reaching and loosening nuts in tight spaces under the sink.
- Penetrating Oil: To help loosen corroded or stuck parts.
- White Vinegar: For cleaning mineral deposits.
- New Faucet Repair Kit: Specifically designed for your faucet type. These kits typically include replacement O-rings, washers, and seals.
- Plumber’s Grease: To lubricate new parts and ensure smooth operation.
- Clean Rags or Towels: For wiping up spills and protecting surfaces.
- Bucket: To catch any remaining water in the pipes.
Important Safety Tip: Before you begin any plumbing work, always turn off the water supply to the faucet. Locate the shut-off valves under the sink (one for hot water and one for cold water) and turn them clockwise until they are completely closed. If you don’t have individual shut-off valves, you’ll need to turn off the main water supply to your house.
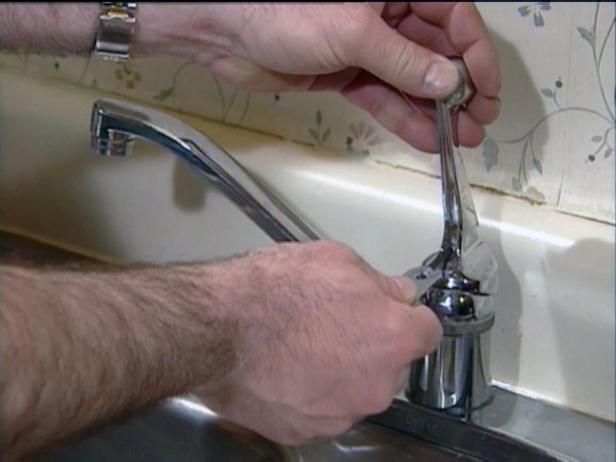
Step-by-Step Guide to Fixing a Leaky Compression Faucet
Compression faucets are the most common type of leaky faucet, and fixing them is usually a straightforward process. Here’s how to do it:
- Turn off the water supply: As mentioned earlier, turn off the hot and cold water supply valves under the sink.
- Remove the handle: Locate the screw that holds the handle in place. It’s usually located on the top or side of the handle and may be hidden under a decorative cap. Use a screwdriver or Allen wrench to remove the screw and then gently pull the handle off.
- Remove the packing nut: Use an adjustable wrench to loosen and remove the packing nut, which is located beneath the handle.
- Remove the valve stem: Once the packing nut is removed, you should be able to pull out the valve stem.
- Replace the washer: At the bottom of the valve stem, you’ll find a rubber washer held in place by a screw. Remove the screw and the old washer, and then replace it with a new washer from your faucet repair kit.
- Inspect the valve seat: The valve seat is the part of the faucet body that the washer presses against to stop the flow of water. If the valve seat is corroded or damaged, it can prevent the new washer from sealing properly. You can use a valve seat wrench to remove and replace the valve seat, or you can try cleaning it with white vinegar and a scrub brush.
- Reassemble the faucet: Once you’ve replaced the washer and inspected the valve seat, reassemble the faucet in the reverse order of disassembly. Apply plumber’s grease to the threads of the valve stem and packing nut before reassembling.
- Turn on the water supply: Slowly turn on the hot and cold water supply valves and check for leaks. If the faucet is still leaking, double-check that you’ve properly installed the new washer and that the valve seat is clean and undamaged.
Step-by-Step Guide to Fixing a Leaky Ball Faucet
Ball faucets can be a bit more complex to repair than compression faucets, but with patience and attention to detail, you can usually fix them yourself. Here’s how:
- Turn off the water supply: Turn off the hot and cold water supply valves under the sink.
- Loosen the set screw: Locate the set screw on the side of the faucet handle and use an Allen wrench to loosen it.
- Remove the handle: Gently pull the handle off the faucet.
- Loosen the cap and collar: Use an adjustable wrench to loosen the cap and collar that covers the ball valve.
- Remove the ball valve: Lift the ball valve out of the faucet body.
- Inspect the O-rings and seals: Examine the O-rings and seals on the ball valve and in the faucet body for wear or damage. Replace any worn or damaged O-rings and seals with new ones from your faucet repair kit.
- Reassemble the faucet: Reassemble the faucet in the reverse order of disassembly. Apply plumber’s grease to the O-rings and seals before reassembling.
- Turn on the water supply: Slowly turn on the hot and cold water supply valves and check for leaks. If the faucet is still leaking, double-check that you’ve properly installed the new O-rings and seals and that the ball valve is seated correctly.
Step-by-Step Guide to Fixing a Leaky Cartridge Faucet
Cartridge faucets are relatively easy to repair, as the cartridge can be replaced as a single unit. Here’s how to fix a leaky cartridge faucet:
- Turn off the water supply: Turn off the hot and cold water supply valves under the sink.
- Remove the handle: Locate the set screw on the side of the faucet handle and use an Allen wrench to loosen it. Gently pull the handle off the faucet. Some models might have a decorative cap that needs to be pried off first to reveal the screw.
- Remove the retaining clip: Some cartridge faucets have a retaining clip that holds the cartridge in place. Use pliers or a screwdriver to remove the retaining clip.
- Pull out the cartridge: Grasp the cartridge and pull it straight out of the faucet body. You may need to wiggle it gently to loosen it.
- Replace the cartridge: Install the new cartridge from your faucet repair kit. Make sure it’s properly aligned and seated in the faucet body.
- Reinstall the retaining clip: If your faucet has a retaining clip, reinstall it to secure the cartridge in place.
- Reassemble the faucet: Reassemble the faucet in the reverse order of disassembly. Apply plumber’s grease to the cartridge before reassembling.
- Turn on the water supply: Slowly turn on the hot and cold water supply valves and check for leaks. If the faucet is still leaking, double-check that you’ve properly installed the new cartridge and that it’s seated correctly.
Step-by-Step Guide to Fixing a Leaky Ceramic Disc Faucet
Ceramic disc faucets are generally very reliable, but they can sometimes develop leaks due to damaged ceramic discs or seals. Here’s how to fix a leaky ceramic disc faucet:
- Turn off the water supply: Turn off the hot and cold water supply valves under the sink.
- Remove the handle: Locate the set screw on the side of the faucet handle and use an Allen wrench to loosen it. Gently pull the handle off the faucet.
- Remove the escutcheon cap: The escutcheon cap is a decorative cover that hides the valve cartridge. Use a screwdriver to carefully pry off the escutcheon cap.
- Remove the ceramic cylinder: Unscrew the cylinder and gently pull it out.
- Remove the neoprene seals: Underneath the cylinder, you’ll find neoprene seals. Use a small screwdriver or pick to remove these.
- Clean the cylinder ports: Use a cotton swab dipped in white vinegar to clean out any debris or mineral deposits from the cylinder ports.
- Replace the seals: Install new neoprene seals from your faucet repair kit. Make sure they are properly seated in the faucet body.
- Reassemble the faucet: Reassemble the faucet in the reverse order of disassembly. Apply plumber’s grease to the seals before reassembling.
- Turn on the water supply: Slowly turn on the hot and cold water supply valves and check for leaks. If the faucet is still leaking, double-check that you’ve properly installed the new seals and that the ceramic cylinder is seated correctly.
Troubleshooting Common Leaky Faucet Problems
Sometimes, fixing a leaky faucet isn’t as simple as replacing a few parts. Here are some common problems and how to troubleshoot them:
- Leaky Spout: If the faucet is leaking from the base of the spout, the O-rings that seal the spout to the faucet body may be worn out. Replace the O-rings with new ones from your faucet repair kit.
- Dripping Faucet: A constantly dripping faucet is usually caused by a worn-out washer or cartridge. Replace the washer or cartridge with a new one from your faucet repair kit.
- Low Water Pressure: Low water pressure can be caused by a clogged aerator. Remove the aerator and clean it with white vinegar and a scrub brush.
- No Hot or Cold Water: If you’re not getting hot or cold water, the shut-off valves may be partially closed. Make sure the shut-off valves are fully open.
- Stuck or Corroded Parts: If you’re having trouble removing a part due to corrosion or rust, try applying penetrating oil and letting it sit for a few minutes before attempting to remove the part again.
Preventing Future Leaks and Maintaining Your Faucet
Once you’ve fixed your leaky faucet, there are several things you can do to prevent future leaks and keep your faucet in good working order:
- Regularly Clean Your Faucet: Clean your faucet regularly with a mild soap and water solution to remove mineral deposits and grime.
- Lubricate Moving Parts: Lubricate the moving parts of your faucet with plumber’s grease to ensure smooth operation and prevent wear.
- Avoid Over-Tightening: When tightening nuts and bolts, avoid over-tightening, as this can damage the parts and cause leaks.
- Replace Worn Parts Promptly: If you notice any signs of wear or damage, replace the parts promptly to prevent leaks from developing.
- Consider a Water Softener: If you have hard water, consider installing a water softener to reduce mineral buildup in your faucet and pipes.
The Value of DIY Faucet Repair
Fixing a leaky kitchen faucet is a common household repair that can save you money and prevent water waste. By following these easy diy solutions, you can tackle this project yourself and avoid the expense of hiring a plumber. Beyond the immediate cost savings, resolving leaks promptly helps conserve water, contributing to environmental sustainability and reducing your overall water bill. The ability to diagnose and repair a leaky faucet empowers you to maintain your home efficiently and confidently. Addressing a leaky faucet promptly not only prevents further damage to your fixtures and surrounding areas but also reinforces a proactive approach to home maintenance. With the right tools, a little patience, and this guide, you can restore your faucet to its optimal performance and enjoy a drip-free kitchen for years to come.
