How to Fix a Leaky Faucet: A Comprehensive Guide
A dripping faucet isn’t just annoying; it’s a drain on your wallet and a waste of precious water. If you’re tired of that incessant drip, drip, drip, you’ve come to the right place. This comprehensive guide will walk you through the process of how to fix a leaky faucet, regardless of the type you have. We’ll cover everything from identifying the cause of the leak to replacing worn parts, all while providing expert tips to ensure a successful and long-lasting repair. This isn’t just a quick fix; it’s a deep dive into understanding your faucet and preventing future leaks.
Understanding the Anatomy of a Faucet and Leak Causes
Before diving into the repair, it’s crucial to understand the different types of faucets and what commonly causes them to leak. Faucets generally fall into four categories:
- Compression Faucets: These are the oldest type, characterized by separate hot and cold handles. They use a rubber washer that presses against a valve seat to stop the flow of water. Leaks in compression faucets are often due to worn or deteriorated washers.
- Ball Faucets: Common in kitchens, ball faucets have a single handle that controls both water flow and temperature. They use a ball valve with slots and seals to regulate water. Leaks typically arise from worn springs and seals within the valve.
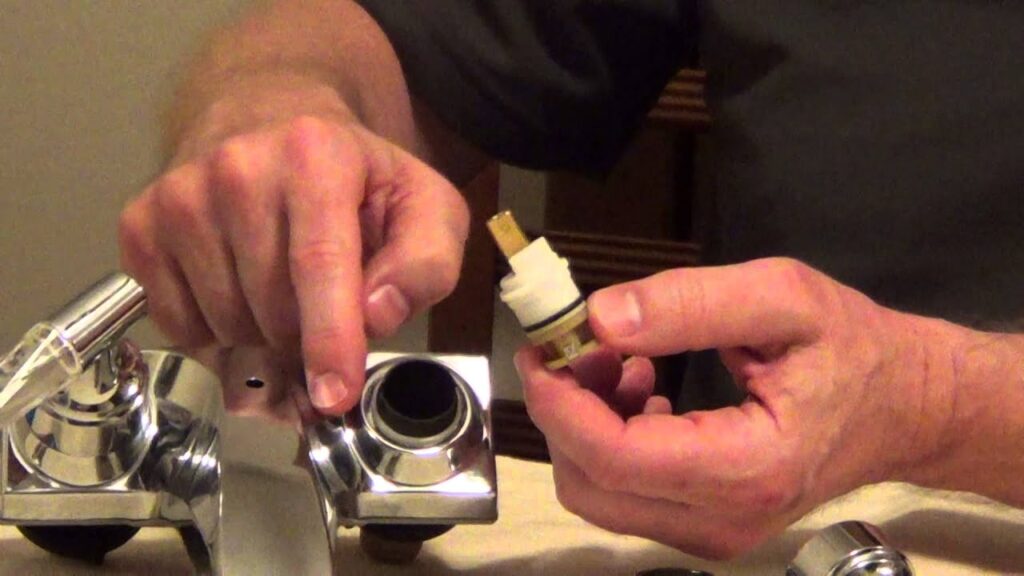
- Cartridge Faucets: Another single-handle design, cartridge faucets use a cartridge that moves up and down to control water flow. Leaks often stem from damaged or worn-out cartridges.
- Ceramic Disc Faucets: These are the most modern type, featuring a single lever that raises and lowers to control water flow and temperature. They use two ceramic discs that slide over each other. Leaks are less common but can occur due to cracked or damaged discs or debris buildup.
Common causes of leaky faucets include:
- Worn Washers: This is the most frequent culprit, especially in compression faucets. Over time, the washer hardens, cracks, or deteriorates, preventing a tight seal.
- O-Ring Problems: O-rings are small, round seals that provide a watertight connection between faucet components. They can become brittle or cracked, leading to leaks.
- Loose Parts: Over time, handles, nuts, and screws can loosen, disrupting the faucet’s internal mechanism and causing leaks.
- Corroded Valve Seat: The valve seat is the area where the washer presses to stop water flow. Corrosion can create an uneven surface, preventing a proper seal.
- Mineral Buildup: Hard water can lead to mineral deposits that interfere with the faucet’s operation and cause leaks.
Essential Tools and Materials for Faucet Repair
Having the right tools and materials on hand is essential for a smooth and efficient faucet repair. Here’s a list of what you’ll typically need:
- Adjustable Wrench: For loosening and tightening nuts and bolts.
- Screwdrivers: Both flathead and Phillips head, in various sizes.
- Pliers: For gripping and manipulating small parts.
- Allen Wrench Set: For removing set screws on some faucet handles.
- Penetrating Oil: To loosen stubborn nuts and bolts.
- White Vinegar: For soaking mineral-encrusted parts.
- New Washers, O-Rings, and Cartridges: Have a selection on hand, or purchase a faucet repair kit specific to your faucet type.
- Plumber’s Grease: For lubricating parts and ensuring a smooth operation.
- Clean Rags or Sponges: For wiping up spills and cleaning parts.
- Basin Wrench (Optional): For reaching hard-to-access nuts under the sink.
- Valve Seat Wrench (Optional): For removing and replacing valve seats in compression faucets.
Safety First: Before you begin any faucet repair, always turn off the water supply to the faucet. This is usually done by closing the shut-off valves located under the sink. If you can’t find shut-off valves, you may need to turn off the main water supply to your house.
Step-by-Step Guide: How to Fix a Leaky Compression Faucet
Compression faucets are relatively simple to repair. Here’s a step-by-step guide:
- Turn off the water supply: Locate the shut-off valves under the sink and turn them clockwise to close.
- Plug the drain: This prevents small parts from falling into the drain.
- Remove the handle: Depending on the faucet, you may need to pry off a decorative cap on the handle to access a screw. Loosen the screw and pull off the handle.
- Remove the packing nut: This nut holds the stem in place. Use an adjustable wrench to loosen and remove it.
- Remove the stem: Gently pull the stem straight up and out of the faucet body.
- Remove the old washer: The washer is located at the bottom of the stem. Use a small screwdriver or pick to pry it off.
- Replace the washer: Install a new washer of the same size and type.
- Inspect the valve seat: Look for signs of corrosion or damage. If necessary, use a valve seat wrench to remove and replace the valve seat.
- Reassemble the faucet: Apply plumber’s grease to the stem threads and reassemble the faucet in the reverse order of disassembly.
- Turn on the water supply: Slowly turn on the shut-off valves and check for leaks.
Repairing a Leaky Ball Faucet: A Detailed Walkthrough
Ball faucets can be a bit more complex, but with patience, you can tackle the repair. Here’s how:
- Turn off the water supply and plug the drain: As with any faucet repair, safety first.
- Loosen the set screw: Locate the set screw on the side of the handle. Use an Allen wrench to loosen it.
- Remove the handle: Pull the handle straight up and off the faucet body.
- Loosen the cap and collar: Use an adjustable wrench to loosen the cap and collar.
- Remove the ball and stem: Carefully lift out the ball and stem assembly.
- Inspect the ball and seats: Look for signs of wear or damage on the ball, seats, and springs.
- Replace the seats and springs: Use a small screwdriver or pick to remove the old seats and springs. Install new ones.
- Reassemble the faucet: Apply plumber’s grease to the ball and reassemble the faucet in the reverse order of disassembly.
- Turn on the water supply: Slowly turn on the shut-off valves and check for leaks.
Fixing a Leaky Cartridge Faucet: A Practical Guide
Cartridge faucets are generally easier to repair than ball faucets. Here’s the process:
- Turn off the water supply and plug the drain: Always start with safety.
- Remove the handle: Depending on the faucet, you may need to pry off a decorative cap to access a screw. Loosen the screw and pull off the handle.
- Remove the retaining clip: This clip holds the cartridge in place. Use pliers or a screwdriver to remove it.
- Pull out the cartridge: The cartridge may be stiff. Gently wiggle it back and forth while pulling straight up.
- Replace the cartridge: Install a new cartridge of the same size and type. Make sure it’s properly aligned.
- Reassemble the faucet: Reinstall the retaining clip and handle.
- Turn on the water supply: Slowly turn on the shut-off valves and check for leaks.
Addressing Leaks in Ceramic Disc Faucets: A Troubleshooting Approach
Ceramic disc faucets are less prone to leaks, but when they do occur, it’s often due to debris buildup or damaged discs. Here’s how to troubleshoot and repair them:
- Turn off the water supply and plug the drain: Safety first, as always.
- Remove the handle: As with other faucets, you may need to pry off a decorative cap to access a screw. Loosen the screw and pull off the handle.
- Remove the cylinder: This part covers the ceramic discs.
- Clean the ceramic discs: Carefully remove the discs and clean them with a soft cloth and white vinegar to remove any mineral deposits.
- Inspect the discs for damage: If the discs are cracked or chipped, they’ll need to be replaced.
- Reassemble the faucet: Reinstall the discs and cylinder.
- Turn on the water supply: Slowly turn on the shut-off valves and check for leaks.
Preventative Maintenance for a Leak-Free Faucet
Prevention is always better than cure. Here are some tips to keep your faucets in top condition and prevent future leaks:
- Regularly inspect your faucets: Check for drips, leaks, or signs of corrosion.
- Tighten loose parts: Periodically tighten handles, nuts, and screws to prevent leaks.
- Replace worn washers and O-rings: Don’t wait for a leak to develop. Replace these parts every few years as part of your routine maintenance.
- Clean mineral deposits: Use white vinegar to remove mineral buildup from faucet parts.
- Use a water softener: If you have hard water, a water softener can help prevent mineral buildup and extend the life of your faucets.
- Lubricate faucet parts: Apply plumber’s grease to moving parts to ensure smooth operation and prevent wear.
Troubleshooting Common Faucet Problems
Even with careful maintenance, faucet problems can arise. Here are some common issues and how to address them:
- Faucet drips constantly: This is usually due to a worn washer or O-ring. Replace the affected part.
- Faucet leaks only when turned on: This could indicate a problem with the valve seat or cartridge. Inspect and replace as needed.
- Faucet makes noise when turned on: This could be due to mineral buildup or loose parts. Clean the faucet and tighten any loose connections.
- Water pressure is low: This could be caused by a clogged aerator or a problem with the water supply. Clean the aerator and check the water pressure to your house.
- Handle is difficult to turn: This could be due to mineral buildup or corrosion. Clean and lubricate the handle and stem.
The Value of a Properly Functioning Faucet
Fixing a leaky faucet isn’t just about saving money on your water bill; it’s also about conserving water, protecting your home from water damage, and ensuring the smooth operation of your plumbing system. A dripping faucet can waste hundreds of gallons of water per year, which adds up to a significant cost and a strain on our natural resources. By taking the time to fix a leaky faucet, you’re making a responsible choice that benefits both your wallet and the environment.
Is it Time to Call a Plumber?
While many faucet repairs are within the capabilities of a DIY enthusiast, there are times when it’s best to call a professional plumber. If you’re uncomfortable working with plumbing, if you encounter a problem you can’t solve, or if the leak is severe, don’t hesitate to seek expert help. A plumber can quickly diagnose the problem and provide a reliable solution, ensuring that your faucet is properly repaired and that your plumbing system is functioning safely and efficiently. According to leading experts in home repair, attempting complex fixes without proper knowledge can lead to further damage and higher repair costs in the long run. In our experience, knowing when to call a professional is just as important as knowing how to do it yourself.
Taking Control of Your Home’s Plumbing
Learning how to fix a leaky faucet is a valuable skill that empowers you to take control of your home’s plumbing and prevent costly water waste. By understanding the different types of faucets, the common causes of leaks, and the steps involved in repairing them, you can confidently tackle this common household problem. Remember to always prioritize safety by turning off the water supply before starting any repair, and don’t hesitate to seek professional help when needed. Share your experiences with fixing leaky faucets in the comments below, and let’s learn from each other!
