Sink Is Leaking? Expert Tips to Stop the Drip and Save Your Home
Discovering that your sink is leaking can be a homeowner’s nightmare. That persistent drip, drip, drip isn’t just annoying; it’s a sign of potential water damage, wasted water, and escalating utility bills. But don’t panic! This comprehensive guide will equip you with the knowledge to diagnose the source of the leak, understand the underlying causes, and implement effective solutions, whether you’re a seasoned DIY enthusiast or a complete novice. We’ll walk you through everything from identifying common leak locations to performing simple repairs, ensuring you can tackle this problem head-on and protect your home from further damage. Our expertise in plumbing and home repair allows us to provide insights you won’t find anywhere else, making this your ultimate resource for stopping that troublesome leak.
Understanding the Anatomy of a Sink and Common Leak Locations
Before you can fix a leaking sink, it’s essential to understand its basic components and where leaks typically occur. A standard sink setup includes the faucet, the sink basin itself, the drain assembly, and the water supply lines. Each of these areas is a potential source of leaks, and pinpointing the exact location is the first step toward a successful repair.
Faucet Leaks: Drips, Sprays, and Everything In Between
Faucet leaks are perhaps the most common type. They can manifest as a constant drip from the spout, a spray from the base of the faucet, or leaks around the handles. These issues often stem from worn-out washers, O-rings, or cartridges within the faucet assembly. Over time, these components deteriorate due to constant use and exposure to water, leading to leaks. Mineral buildup can also contribute, especially in areas with hard water.
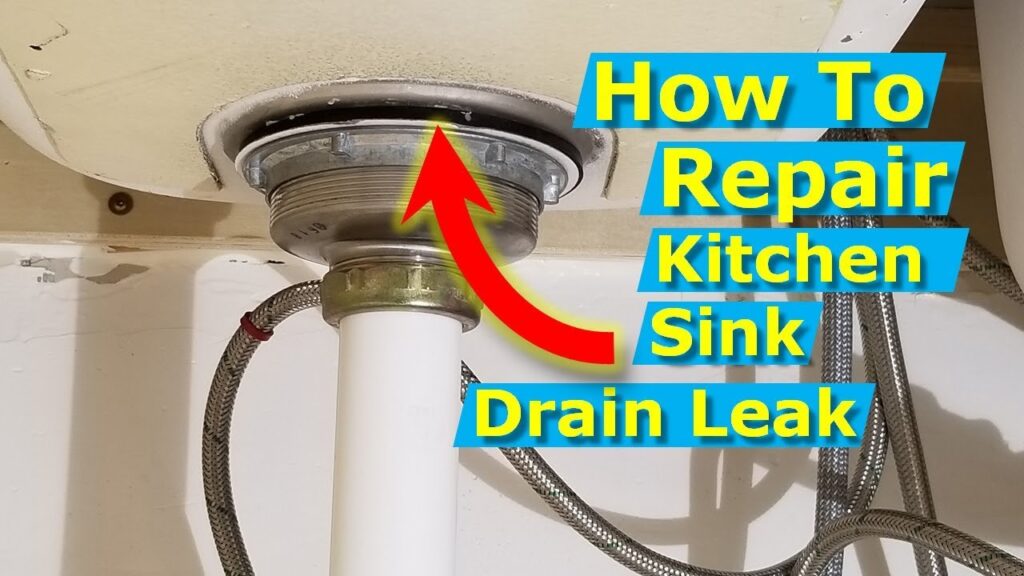
Drain Assembly Leaks: The Maze Under Your Sink
The drain assembly, located beneath the sink, is a complex network of pipes and connections. Leaks in this area can be tricky to diagnose due to the multiple potential sources. Common culprits include loose connections, corroded pipes, and damaged P-traps (the curved section of pipe designed to trap debris and prevent sewer gases from entering your home). The sink flange, where the drain meets the sink basin, is another frequent leak point, often due to a worn-out plumber’s putty or a loose connection.
Supply Line Leaks: From the Wall to the Faucet
The supply lines connect your sink to the main water supply. These flexible or rigid pipes can develop leaks at the connections to the faucet or the shut-off valves on the wall. Over time, the connections can loosen, or the pipes themselves can corrode or crack, especially if they are made of older materials like copper or galvanized steel. Supply line leaks can often be sudden and significant, so it’s crucial to address them promptly.
Sink Basin Leaks: Cracks and Corrosion
While less common than faucet or drain leaks, the sink basin itself can sometimes be the source of the problem. Cracks can develop in ceramic or porcelain sinks due to impacts or stress, while stainless steel sinks can corrode over time, particularly around the drain opening. These types of leaks often require more extensive repairs or even sink replacement.
Essential Tools and Materials for Sink Leak Repair
Before diving into any repair, it’s essential to gather the necessary tools and materials. Having everything on hand will save you time and frustration. Here’s a list of essentials:
- Adjustable wrench: For tightening and loosening nuts and bolts.
- Basin wrench: Specifically designed for accessing hard-to-reach nuts under the sink.
- Pliers: For gripping and manipulating small parts.
- Screwdrivers (Phillips and flathead): For removing faucet handles and other components.
- Plumber’s putty: For sealing connections around the drain and faucet.
- Teflon tape: For sealing threaded connections on pipes and fittings.
- Replacement washers, O-rings, and cartridges: For repairing faucet leaks.
- New supply lines: If your existing supply lines are corroded or damaged.
- Bucket and towels: For catching water and cleaning up spills.
- Safety glasses: To protect your eyes from debris.
In addition to these basic tools, you may also need specialized tools depending on the specific type of leak you’re dealing with. For example, a faucet cartridge puller can be helpful for removing stubborn faucet cartridges.
Step-by-Step Guide to Diagnosing and Fixing Common Sink Leaks
Now that you understand the anatomy of a sink and have gathered your tools, let’s walk through the process of diagnosing and fixing some common sink leaks.
Fixing a Leaky Faucet Spout
A dripping faucet spout is often caused by a worn-out washer or O-ring. Here’s how to fix it:
- Turn off the water supply: Locate the shut-off valves under the sink and turn them clockwise to shut off the water.
- Disassemble the faucet: Depending on the faucet type, you may need to remove the handle, spout, and other components to access the washer or O-ring. Consult your faucet’s manual for specific instructions.
- Replace the worn parts: Once you’ve accessed the washer or O-ring, remove the old one and replace it with a new one of the same size and type.
- Reassemble the faucet: Carefully reassemble the faucet components, making sure everything is properly aligned and tightened.
- Turn on the water supply: Slowly turn the shut-off valves counterclockwise to restore the water supply. Check for leaks.
Repairing a Leaky Drain Assembly
Leaks in the drain assembly often occur at the connections between the pipes. Here’s how to address them:
- Turn off the water supply: As with faucet repairs, start by turning off the water supply to the sink.
- Inspect the drain assembly: Carefully examine the drain pipes and connections for signs of leaks. Look for water droplets, corrosion, or loose connections.
- Tighten loose connections: Use an adjustable wrench to tighten any loose nuts or fittings. Be careful not to overtighten, as this can damage the pipes.
- Replace damaged pipes or fittings: If you find any corroded or damaged pipes or fittings, replace them with new ones of the same size and type.
- Apply plumber’s putty to the sink flange: If the leak is coming from the sink flange, remove the flange, clean the area, and apply a fresh layer of plumber’s putty before reinstalling the flange.
- Test for leaks: After making the repairs, run water into the sink and check for leaks.
Addressing Leaky Supply Lines
Supply line leaks can be caused by loose connections or damaged pipes. Here’s how to fix them:
- Turn off the water supply: Turn off the water supply to the sink.
- Inspect the supply lines: Check the connections at the faucet and the shut-off valves for leaks. Also, inspect the pipes themselves for corrosion or damage.
- Tighten loose connections: Use an adjustable wrench to tighten any loose connections.
- Replace damaged supply lines: If the supply lines are corroded or damaged, replace them with new ones. Be sure to use the correct type and size of supply line for your sink.
- Use Teflon tape on threaded connections: When connecting the new supply lines, wrap Teflon tape around the threaded connections to ensure a watertight seal.
- Test for leaks: After making the repairs, turn on the water supply and check for leaks.
Preventive Measures: Keeping Your Sink Leak-Free
Prevention is always better than cure. Here are some tips to help prevent sink leaks in the first place:
- Regularly inspect your sink: Periodically check your sink for any signs of leaks, such as water droplets, corrosion, or dampness.
- Tighten loose connections: Regularly tighten any loose nuts or fittings on the faucet, drain assembly, and supply lines.
- Replace worn parts: Replace worn washers, O-rings, and cartridges in your faucet as needed.
- Avoid harsh chemicals: Avoid using harsh chemicals or abrasive cleaners in your sink, as they can damage the pipes and fittings.
- Protect your pipes from freezing: In cold climates, take steps to protect your pipes from freezing, as freezing can cause them to burst.
When to Call a Professional Plumber
While many sink leaks can be fixed with DIY methods, some situations require the expertise of a professional plumber. Here are some signs that it’s time to call in the pros:
- You’re unable to locate the source of the leak.
- The leak is coming from inside the wall or floor.
- You’re dealing with extensive corrosion or damage.
- You’re uncomfortable working with plumbing.
Attempting to fix a complex plumbing problem without the proper knowledge and tools can lead to further damage and costly repairs. When in doubt, it’s always best to err on the side of caution and call a qualified plumber.
The Value of a Leak-Free Sink
Addressing a sink is leaking promptly is not just about fixing a minor inconvenience; it’s about protecting your home, conserving water, and saving money. A seemingly small drip can waste gallons of water over time, leading to higher water bills and potential water damage to your cabinets, floors, and walls. By taking the time to diagnose and repair leaks, you’re not only preventing these issues but also ensuring the longevity of your plumbing system. Moreover, fixing a leak yourself provides a sense of accomplishment and empowers you to tackle future home repairs with confidence. It’s an investment in your home’s value and your peace of mind.
Expert Answers to Your Sink Leak Questions
Here are some frequently asked questions about sink leaks, along with expert answers to help you troubleshoot and resolve common issues:
-
Question: What’s the most common cause of a leaky kitchen sink faucet?
Answer: The most common culprit is usually a worn-out washer or O-ring inside the faucet. Over time, these rubber components degrade from constant use and exposure to water, leading to drips. Replacing these parts is a relatively simple and inexpensive fix.
-
Question: How can I tell if a leak is coming from the drain or the supply lines?
Answer: A simple test is to dry the area under the sink thoroughly with a towel. Then, run the faucet and observe where the first drops of water appear. If the water is coming from the drain assembly, it’s likely a drain leak. If it’s coming from the pipes connected to the faucet, it’s probably a supply line issue.
-
Question: Can I use Teflon tape on plastic pipes?
Answer: Yes, Teflon tape is safe and effective for sealing threaded connections on both metal and plastic pipes. Just be sure to wrap the tape in the correct direction (clockwise when looking at the end of the pipe) and apply enough layers to create a tight seal.
-
Question: What’s the best way to remove a stubborn faucet handle?
Answer: Start by loosening the set screw that holds the handle in place. If the handle is still stuck, try using a faucet handle puller, which is a specialized tool designed to remove handles without damaging the faucet. You can also try gently tapping the handle with a rubber mallet to loosen it.
-
Question: How often should I replace my sink supply lines?
Answer: It’s generally recommended to replace your sink supply lines every 5-10 years, even if they don’t show any signs of leaks. Over time, the rubber or plastic in the lines can deteriorate, increasing the risk of a burst. Replacing them proactively can prevent a potentially messy and costly water damage situation.
-
Question: My sink is leaking only when the garbage disposal is running. What could be the problem?
Answer: This often indicates a leak in the connection between the garbage disposal and the sink drain. Check the mounting bolts and the rubber gasket that seals the disposal to the sink. Tighten the bolts if they’re loose, and replace the gasket if it’s cracked or worn.
-
Question: What type of plumber’s putty should I use for my sink drain?
Answer: Use a non-hardening plumber’s putty specifically designed for plumbing applications. Avoid using hardening putty, as it can be difficult to remove later if you need to make repairs. A good quality plumber’s putty will remain pliable and create a watertight seal.
-
Question: Can I use vinegar to clean my sink drain?
Answer: Yes, vinegar is a safe and effective way to clean your sink drain. Pour a cup of baking soda down the drain, followed by a cup of vinegar. Let it fizz for about 30 minutes, then flush with hot water. This can help dissolve grease and debris that are causing clogs and leaks.
-
Question: What are the signs of a hidden sink leak?
Answer: Look for signs of water damage around the sink, such as stains on the cabinets or floor, a musty odor, or peeling paint. You may also notice an unexplained increase in your water bill. If you suspect a hidden leak, it’s important to investigate further and call a plumber if necessary.
-
Question: How can I prevent my pipes from freezing in the winter?
Answer: Insulate your pipes with foam pipe insulation, especially in unheated areas like basements or crawl spaces. Let the faucet drip slightly during extremely cold weather to keep water moving through the pipes. You can also open cabinet doors under the sink to allow warm air to circulate around the pipes.
Taking Control of Your Home’s Plumbing
By understanding the common causes of sink leaks and learning how to address them, you can save yourself time, money, and potential headaches. Remember to always prioritize safety by turning off the water supply before starting any repairs, and don’t hesitate to call a professional plumber when needed. Armed with the knowledge and tools in this guide, you’re well-equipped to tackle most sink leak issues and maintain a healthy, leak-free home. Share your experiences with tackling a sink is leaking in the comments below. We are happy to help you find the best solutions!
