How to Fix a Leaky Hose at the Bottom of Your Kitchen Tap: A Comprehensive Guide
Is your kitchen tap dripping incessantly, and have you traced the problem back to a leaky hose connection at the bottom? That persistent drip isn’t just annoying; it’s wasting water and potentially causing damage to your kitchen cabinets. You’ve come to the right place. This comprehensive guide will walk you through the entire process of how yo fix hose yo bottom of kitchen tap, from diagnosing the problem to implementing a lasting solution. We’ll cover everything from identifying the correct replacement parts to step-by-step instructions, ensuring you can tackle this common plumbing issue with confidence. We aim to provide a resource that is more thorough, more practical, and ultimately more helpful than anything else you’ll find online. Our goal is to empower you with the knowledge and skills to resolve this issue effectively, saving you time, money, and the headache of a persistent leak.
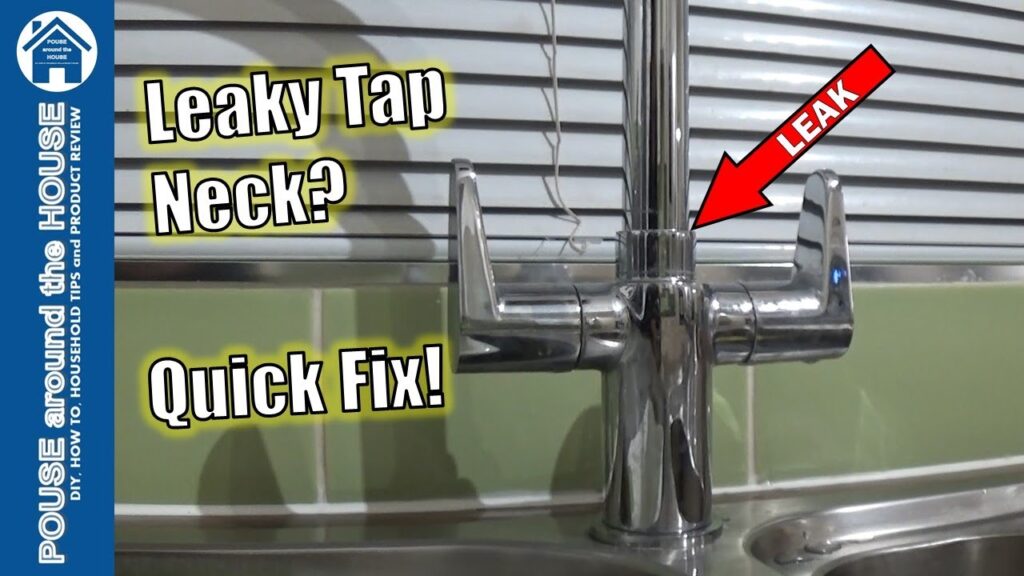
Understanding the Anatomy of Your Kitchen Tap and Hose Connections
Before diving into the repair process, it’s crucial to understand the different components of your kitchen tap and how they connect. The typical kitchen tap setup includes:
- The Tap Body: The main structure of the faucet, housing the valve mechanisms that control water flow.
- Inlet Hoses: Flexible hoses that connect the tap to the hot and cold water supply lines. These are usually braided stainless steel or flexible plastic.
- Connecting Nuts/Fittings: These secure the hoses to both the tap body and the water supply pipes. Common types include compression fittings and threaded connections.
- O-rings and Washers: Small rubber or silicone seals that create a watertight barrier between connections. These are a frequent source of leaks.
- Cartridge or Valve: The internal mechanism that controls the flow and mixing of hot and cold water. While not directly part of the hose connection, a faulty cartridge can sometimes mimic a hose leak.
Understanding how these parts fit together will help you pinpoint the exact location of the leak and determine the necessary repairs. Leaks at the bottom of the kitchen tap are most often caused by degradation of the hose itself, a loose connection, or a worn-out O-ring or washer within the connection.
Diagnosing the Leak: Identifying the Root Cause
Pinpointing the source of the leak is the first and most important step. Here’s a systematic approach:
- Dry the Area: Thoroughly dry the area around the base of the tap and the hose connections with a clean cloth. This will make it easier to see where the water is actively leaking from.
- Observe Carefully: Turn on the tap and carefully observe the hose connections. Look for water droplets forming at the point where the hose connects to the tap body or where it connects to the water supply valve.
- Feel for Moisture: If the leak is small, you might not see visible droplets. Run your finger along the hose and around the connections to feel for any dampness.
- Check the O-rings and Washers: If the leak appears to be coming from within a connection, the O-ring or washer is likely the culprit. These small seals can dry out, crack, or become deformed over time, leading to leaks.
- Inspect the Hose Itself: Examine the hose for any signs of damage, such as cracks, bulges, or kinks. Even a small crack can cause a significant leak under pressure.
Once you’ve identified the source of the leak, you can determine the appropriate repair strategy.
Essential Tools and Materials for the Repair
Before you start the repair, gather the necessary tools and materials. Having everything on hand will make the process much smoother and more efficient. Here’s a list of essentials:
- Adjustable Wrench: For tightening and loosening the connecting nuts. Two wrenches are often helpful.
- Basin Wrench (Optional): This specialized wrench is designed for working in tight spaces under the sink.
- Screwdrivers: Both Phillips head and flathead screwdrivers may be needed to remove the tap from the countertop.
- New Inlet Hose(s): If the hose itself is damaged, you’ll need to replace it. Be sure to buy the correct size and type of hose for your tap.
- Replacement O-rings and Washers: If the leak is coming from a connection, replacing the O-rings and washers is a good first step.
- Plumber’s Tape (Teflon Tape): This tape is used to create a watertight seal on threaded connections.
- Bucket or Towel: To catch any water that spills during the repair.
- Cleaning Supplies: A cloth, sponge, and some mild detergent to clean the area.
- Flashlight or Headlamp: To provide better visibility in the dimly lit space under the sink.
Step-by-Step Guide: How Yo Fix Hose Yo Bottom of Kitchen Tap
Now, let’s get to the actual repair. Follow these steps carefully to fix that leaky hose:
- Turn Off the Water Supply: This is the most crucial step! Locate the shut-off valves under the sink for both the hot and cold water lines and turn them off completely. If you don’t have individual shut-off valves, you’ll need to turn off the main water supply to your house.
- Relieve Water Pressure: Turn on the kitchen tap to relieve any remaining water pressure in the lines. Let the water run until it stops completely.
- Disconnect the Old Hose: Use an adjustable wrench to loosen the connecting nuts that secure the hose to the tap body and the water supply valve. Have a bucket or towel ready to catch any remaining water in the hose.
- Inspect the Old Hose and Connections: Once the hose is disconnected, inspect it for any damage. Also, examine the O-rings and washers for wear and tear. This will confirm your initial diagnosis.
- Replace the O-rings and Washers (if necessary): If the O-rings or washers are damaged, remove them and replace them with new ones. Make sure the new seals are the correct size and type.
- Wrap Threads with Plumber’s Tape: If the connection is threaded, wrap the threads with plumber’s tape in a clockwise direction. This will help create a watertight seal.
- Connect the New Hose (or Reconnect the Old Hose): Attach the new hose (or the old hose, if you’re just replacing the seals) to the tap body and the water supply valve. Tighten the connecting nuts securely with an adjustable wrench. Be careful not to overtighten, as this can damage the fittings.
- Turn On the Water Supply Slowly: Slowly turn on the shut-off valves under the sink. Check for any leaks at the connections. If you see any leaks, tighten the connecting nuts slightly.
- Test the Tap: Turn on the kitchen tap and check for leaks. Let the water run for a few minutes to ensure the connections are watertight.
- Clean Up: Clean up any spills and dispose of the old hose and seals properly.
Troubleshooting Common Problems
Even with careful attention to detail, you might encounter some problems during the repair. Here are some common issues and how to address them:
- The Connecting Nuts are Stuck: If the connecting nuts are corroded or stuck, try applying a penetrating oil (like WD-40) to loosen them. Let the oil sit for a few minutes before attempting to loosen the nuts again.
- The New Hose Doesn’t Fit: Make sure you’ve purchased the correct size and type of hose for your tap. Double-check the measurements and the type of connection (e.g., compression fitting, threaded connection).
- The Leak Persists After the Repair: If the leak persists after you’ve replaced the hose and seals, double-check all the connections to ensure they are tight. Also, inspect the tap body for any cracks or damage that might be causing the leak. It’s possible that the valve cartridge itself is leaking.
- Difficulty Accessing the Connections: Working under the sink can be challenging due to limited space. Use a basin wrench or a flexible extension for your wrench to reach the connections more easily. A headlamp can also help improve visibility.
Choosing the Right Replacement Hose
Selecting the correct replacement hose is crucial for a successful repair. Consider these factors:
- Material: Inlet hoses are typically made of braided stainless steel or flexible plastic (PEX). Stainless steel hoses are more durable and resistant to corrosion, while PEX hoses are more flexible and easier to install in tight spaces.
- Length: Measure the length of the old hose before purchasing a replacement. It’s better to err on the side of slightly longer, as you can always coil the excess hose.
- Connection Type: Ensure the new hose has the same type of connection as the old hose (e.g., compression fitting, threaded connection).
- Diameter: The diameter of the hose must match the diameter of the tap body and the water supply valve.
- Brand Compatibility: While most hoses are universal, it’s always a good idea to check the manufacturer’s recommendations for your specific tap model.
According to industry experts, stainless steel braided hoses are generally preferred for their durability and longevity.
Maintaining Your Kitchen Tap to Prevent Future Leaks
Preventing leaks is always better than fixing them. Here are some tips for maintaining your kitchen tap and preventing future hose leaks:
- Regularly Inspect the Hoses and Connections: Check the hoses and connections for any signs of wear and tear, such as cracks, bulges, or corrosion.
- Tighten Loose Connections: If you notice any loose connections, tighten them gently with an adjustable wrench.
- Replace Worn O-rings and Washers: Replace O-rings and washers as soon as you notice any signs of damage or leakage.
- Avoid Harsh Chemicals: Avoid using harsh chemicals or abrasive cleaners on the tap and hoses, as these can damage the materials and cause leaks.
- Flush the Water Lines Periodically: Flush the water lines periodically to remove any sediment or debris that might be clogging the tap and hoses.
When to Call a Professional Plumber
While most hose leaks can be fixed with DIY methods, there are some situations where it’s best to call a professional plumber:
- You’re Not Comfortable Working with Plumbing: If you’re not comfortable working with plumbing or you’re unsure about any of the steps involved, it’s best to leave the repair to a professional.
- The Leak is Severe: If the leak is severe and you’re unable to stop the water flow, call a plumber immediately.
- You Suspect a More Serious Plumbing Problem: If you suspect that the leak is a symptom of a more serious plumbing problem, such as a burst pipe or a damaged water heater, call a plumber.
- You’ve Tried Everything and the Leak Persists: If you’ve tried all the DIY methods and the leak persists, it’s time to call a plumber.
Attempting a repair beyond your skill level can lead to further damage and potentially costly repairs. A qualified plumber has the expertise and tools to diagnose and fix complex plumbing issues safely and effectively.
The Value of a Properly Functioning Kitchen Tap
Fixing that leaky hose at the bottom of your kitchen tap is about more than just stopping a drip. It’s about:
- Saving Water: Even a small drip can waste a significant amount of water over time, leading to higher water bills and environmental concerns.
- Preventing Damage: A persistent leak can damage your kitchen cabinets, flooring, and other surrounding areas.
- Maintaining a Clean and Sanitary Kitchen: A leaky tap can create a breeding ground for mold and bacteria, compromising the hygiene of your kitchen.
- Improving Your Quality of Life: A quiet, leak-free kitchen is simply more pleasant to be in.
Taking Control of Your Kitchen Plumbing
By understanding the anatomy of your kitchen tap, diagnosing the leak accurately, and following the step-by-step repair guide, you can confidently tackle this common plumbing issue. Remember to prioritize safety by turning off the water supply and relieving water pressure before starting any repairs. With the right tools and materials, and a little bit of patience, you can fix that leaky hose and enjoy a leak-free kitchen. Share your experiences with how yo fix hose yo bottom of kitchen tap in the comments below; we’d love to hear your stories and answer any further questions you may have.
