How to Tighten a Sink Handle: Stop the Wobble and Restore Function
Is your sink handle loose, wobbly, or spinning freely? A loose sink handle isn’t just annoying; it can also lead to drips, wasted water, and even damage to the faucet over time. Fortunately, tightening a sink handle is a relatively simple DIY task that most homeowners can accomplish with basic tools and a little know-how. This comprehensive guide will walk you through the process step-by-step, covering various types of sink handles, identifying the cause of the looseness, and providing expert tips to ensure a secure and long-lasting fix. We’ll also delve into preventative measures to keep your sink handles in top shape, saving you time, money, and frustration in the long run. Whether you’re a seasoned DIYer or a complete beginner, this guide will provide you with the knowledge and confidence to tighten your sink handle like a pro.
Understanding the Anatomy of a Sink Faucet and Handle
Before diving into the tightening process, it’s crucial to understand the basic components of a sink faucet. This knowledge will help you diagnose the problem accurately and choose the right approach for your specific situation.
Common Faucet Components:
- Handle: The part you grip and turn to control water flow and temperature.
- Handle Screw: Secures the handle to the faucet stem. Often hidden beneath a decorative cap.
- Faucet Stem: Connects the handle to the valve cartridge or ceramic disc. Turning the stem opens and closes the water flow.
- Valve Cartridge/Ceramic Disc: The mechanism that controls the mixing of hot and cold water.
- Escutcheon Plate: The decorative plate that covers the faucet body and mounting holes.
- Aerator: Screws onto the faucet spout to mix air with water, reducing splashing and conserving water.
Types of Sink Handles:
- Single-Handle Faucets: Control both water flow and temperature with a single lever.
- Double-Handle Faucets: Have separate handles for hot and cold water.
- Knob Handles: Round or multi-sided knobs that you turn to control water flow.
- Lever Handles: Elongated levers that you move up and down or side to side.
- Cross Handles: Feature a cross-shaped design for a classic look.
Identifying the Cause of a Loose Sink Handle
A loose sink handle can stem from several underlying issues. Pinpointing the exact cause is essential for an effective and lasting repair. Here are some common culprits:
- Loose Handle Screw: This is the most frequent reason for a wobbly handle. Over time, vibrations and regular use can cause the screw to loosen.
- Worn-Out Handle Adapter: Some handles use a plastic or metal adapter to connect to the faucet stem. These adapters can crack or wear down, leading to looseness.
- Corroded or Damaged Faucet Stem: Corrosion or physical damage to the faucet stem can prevent the handle from tightening properly.
- Loose Mounting Nut: Although less directly related to the handle itself, a loose mounting nut beneath the sink can cause the entire faucet to wobble, giving the impression of a loose handle.
- Stripped Screw Threads: Repeated tightening of the handle screw can eventually strip the threads, preventing it from gripping securely.
Tools and Materials You’ll Need
Before you begin, gather the necessary tools and materials to ensure a smooth and efficient repair process. Having everything on hand will prevent interruptions and make the job easier.
- Screwdrivers: A set of screwdrivers, including both Phillips-head and flat-head types, is essential for removing and tightening screws.
- Allen Wrench Set: Some handles are secured with Allen screws, so having a set of Allen wrenches is crucial.
- Adjustable Wrench: Useful for tightening mounting nuts and other faucet components.
- Pliers: Can be helpful for gripping small parts or removing stubborn caps.
- Penetrating Oil: A small can of penetrating oil can help loosen corroded screws or nuts.
- White Vinegar: For soaking and cleaning corroded parts.
- Clean Cloths or Rags: For wiping up spills and cleaning faucet components.
- Replacement Parts: If you suspect a worn-out adapter or stripped screw, have replacement parts on hand.
- Safety Glasses: Protect your eyes from debris or splashes.
- Flashlight or Headlamp: For better visibility, especially when working under the sink.
Step-by-Step Guide to Tightening a Sink Handle
Now, let’s get to the core of the matter: the actual tightening process. Follow these steps carefully, adapting them as needed to suit your specific faucet type.
Step 1: Turn Off the Water Supply
Before you begin any plumbing work, it’s crucial to turn off the water supply to the sink. Locate the shut-off valves under the sink (usually two separate valves for hot and cold water). Turn both valves clockwise until they are fully closed. To ensure the water is completely off, turn on the faucet briefly to relieve any residual pressure.
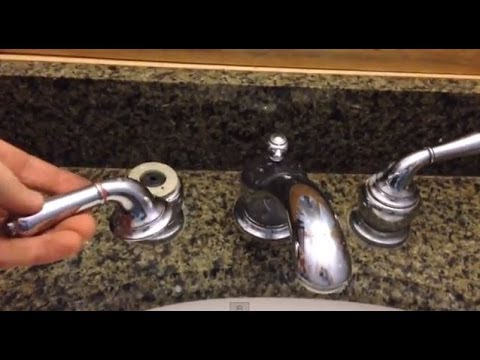
Step 2: Identify the Handle Type and Screw Location
Examine the sink handle to determine its type and how it’s attached. Most handles have a decorative cap that conceals the handle screw. This cap might be on the top, front, or side of the handle. Some handles, particularly those with a more modern design, may not have a visible cap.
Step 3: Remove the Decorative Cap (if applicable)
If your handle has a decorative cap, carefully pry it off using a small flat-head screwdriver or a thin knife. Be gentle to avoid scratching the handle finish. Some caps simply snap off, while others may be threaded and require unscrewing.
Step 4: Tighten the Handle Screw
Once the cap is removed, you’ll see the handle screw. Use the appropriate screwdriver (Phillips-head or flat-head) to tighten the screw. Turn the screwdriver clockwise until the screw is snug. Avoid over-tightening, as this can strip the threads or damage the handle. Check the handle for stability. If it’s still loose, proceed to the next step.
Step 5: Inspect the Handle Adapter (if applicable)
If tightening the screw doesn’t solve the problem, the handle adapter might be the culprit. This is more common in older faucets. The adapter connects the handle to the faucet stem. To inspect it, you may need to remove the handle completely. Once removed, examine the adapter for cracks, wear, or damage. If the adapter is damaged, replace it with a new one.
Step 6: Address a Corroded or Damaged Faucet Stem
If the faucet stem is corroded or damaged, it may prevent the handle from tightening properly. In this case, you may need to replace the entire faucet stem. This is a more complex repair that may require professional assistance. However, you can try cleaning the stem with white vinegar and a wire brush to remove corrosion. If the damage is severe, replacement is the best option.
Step 7: Check the Faucet Mounting Nut
A loose mounting nut beneath the sink can cause the entire faucet to wobble, giving the impression of a loose handle. To check the mounting nut, access the underside of the sink. You’ll typically find one or two large nuts securing the faucet to the sink. Use an adjustable wrench to tighten the nuts. Be careful not to over-tighten, as this can damage the sink or faucet.
Step 8: Reassemble and Test
Once you’ve tightened the handle screw, replaced the adapter (if necessary), or addressed any other issues, reassemble the faucet. Replace the decorative cap (if applicable). Turn the water supply back on slowly and check for leaks. Test the handle to ensure it’s secure and operates smoothly.
Advanced Troubleshooting: Stripped Screw Threads
If the handle screw threads are stripped, simply tightening the screw won’t solve the problem. Here are a few potential solutions:
- Use a Longer Screw: A slightly longer screw may be able to reach undamaged threads deeper inside the faucet stem.
- Wrap the Screw with Teflon Tape: Wrapping the screw threads with Teflon tape can provide extra grip and help it tighten more securely.
- Insert a Small Piece of Steel Wool: Packing a small piece of steel wool into the screw hole can provide a tighter fit.
- Use a Thread Repair Kit: Thread repair kits are available at most hardware stores. These kits allow you to create new threads in the screw hole.
- Replace the Faucet Stem: If all else fails, replacing the faucet stem may be the only option.
Preventive Maintenance for Sink Handles
Preventing sink handle looseness is always better than having to fix it. Here are some tips to keep your sink handles in top shape:
- Regularly Check and Tighten Screws: Periodically check the handle screws and tighten them as needed.
- Avoid Over-Tightening: Over-tightening screws can strip the threads and damage the handle.
- Use the Correct Tools: Using the wrong tools can damage the handle or screws.
- Lubricate Moving Parts: Lubricate the faucet stem and handle adapter with silicone grease to prevent corrosion and wear.
- Clean Regularly: Clean the faucet regularly to remove mineral deposits and grime that can cause corrosion.
Choosing the Right Replacement Parts
When replacing faucet parts, it’s crucial to choose the right ones to ensure compatibility and proper function. Here are some tips:
- Identify the Faucet Brand and Model: Knowing the faucet brand and model will help you find the correct replacement parts.
- Take the Old Part with You: When purchasing a replacement part, take the old part with you to ensure a perfect match.
- Buy from a Reputable Supplier: Purchase replacement parts from a reputable supplier to ensure quality and reliability.
- Consider OEM Parts: Original Equipment Manufacturer (OEM) parts are designed specifically for your faucet and offer the best fit and performance.
When to Call a Professional Plumber
While tightening a sink handle is often a simple DIY task, there are situations where it’s best to call a professional plumber. Consider calling a plumber if:
- You’re Not Comfortable Working with Plumbing: If you’re not comfortable working with plumbing, it’s best to leave the job to a professional.
- You Can’t Identify the Problem: If you’re unable to identify the cause of the loose handle, a plumber can diagnose the issue and recommend the appropriate solution.
- The Problem is Complex: If the problem is complex, such as a corroded faucet stem or a damaged water supply line, a plumber has the expertise and tools to handle the repair safely and effectively.
- You’re Experiencing Leaks: If you’re experiencing leaks, it’s crucial to call a plumber to prevent water damage.
The Importance of Proper Faucet Maintenance
Maintaining your faucets is crucial for extending their lifespan and preventing costly repairs. Regular maintenance can also improve water efficiency and prevent water damage. Simple tasks like tightening loose handles, cleaning mineral deposits, and lubricating moving parts can go a long way in keeping your faucets in top condition. Neglecting faucet maintenance can lead to more serious problems, such as leaks, corrosion, and even complete faucet failure. By investing a little time and effort in faucet maintenance, you can save money and avoid frustration in the long run.
Achieving a Secure and Functional Sink Handle
Tightening a loose sink handle is a straightforward task that can significantly improve the functionality and appearance of your sink. By following the steps outlined in this guide, you can confidently diagnose the problem, gather the necessary tools and materials, and perform the repair yourself. Remember to prioritize safety by turning off the water supply before starting any plumbing work. Regular maintenance and prompt attention to minor issues can prevent more serious problems down the road. A secure and functional sink handle not only enhances your daily routine but also contributes to the overall value and appeal of your home. So, take the time to address that wobbly handle – you’ll be glad you did.
