Sink Repair: Your Comprehensive Guide to Fixing Leaks, Clogs, and More
Is your sink leaking, clogged, or simply not functioning as it should? Don’t despair! Sink repair is often a manageable DIY project, and even when it requires a professional, understanding the basics can save you time, money, and frustration. This comprehensive guide will equip you with the knowledge and skills to tackle common sink problems, from identifying the issue to implementing effective solutions. We aim to provide a resource far exceeding typical online tutorials, offering expert insights and practical advice to ensure a successful and lasting repair.
Understanding the Anatomy of Your Sink
Before diving into repairs, it’s crucial to understand the different parts of your sink. Knowing the terminology will make diagnosing problems and following instructions much easier. Here’s a breakdown of the key components:
- Faucet: The fixture that controls the flow of water. Faucets come in various styles, including single-handle, double-handle, and pull-down models.
- Sink Basin: The bowl-shaped part of the sink that holds water.
- Drain: The opening at the bottom of the sink that allows water to flow out.
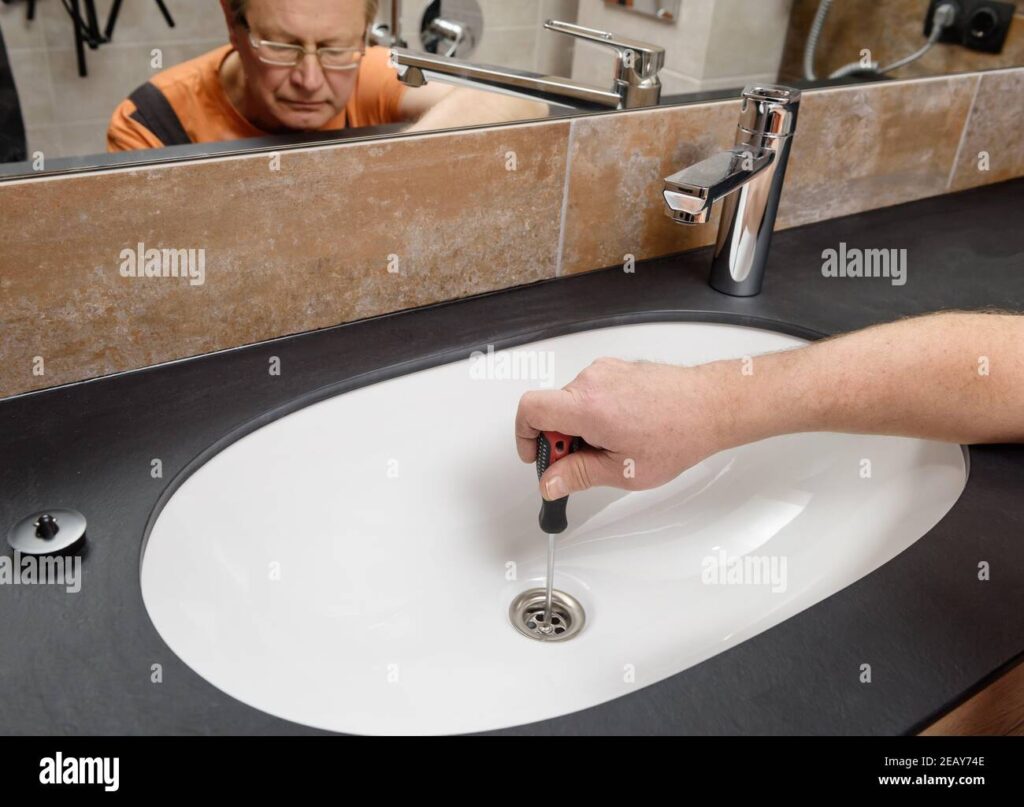
- Strainer: A basket-like component in the drain that catches debris and prevents clogs.
- Tailpiece: The pipe that connects the sink drain to the P-trap.
- P-Trap: A U-shaped pipe that traps debris and prevents sewer gases from entering your home. Its design is critical for maintaining sanitary conditions.
- Drainpipe: The pipe that carries wastewater away from the P-trap to the main plumbing system.
- Supply Lines: Flexible tubes that connect the faucet to the hot and cold water supply valves.
- Shut-Off Valves: Valves located under the sink that allow you to turn off the water supply to the faucet.
Essential Tools and Materials for Sink Repair
Having the right tools and materials on hand will make sink repair projects smoother and more efficient. Here’s a list of essential items:
- Basin Wrench: Used to loosen and tighten nuts on faucets, especially in hard-to-reach areas.
- Plumber’s Wrench: A large adjustable wrench for working on pipes and fittings.
- Channel-Lock Pliers: Versatile pliers for gripping and turning various components.
- Screwdrivers (Phillips and Flathead): For removing and installing screws on faucets and other fixtures.
- Plumber’s Tape (Teflon Tape): Used to seal threaded connections and prevent leaks.
- Plumber’s Putty: A pliable sealant used to create a watertight seal around drains and faucets.
- Adjustable Wrench: For tightening and loosening nuts and bolts.
- Bucket: To catch water during repairs.
- Rags or Towels: To clean up spills and protect surfaces.
- Penetrating Oil: To loosen corroded nuts and bolts.
- New Parts: Replacement parts such as O-rings, washers, cartridges, and drain assemblies.
Diagnosing Common Sink Problems
Accurately diagnosing the problem is the first step towards a successful sink repair. Here are some common sink issues and their potential causes:
- Leaky Faucet: Worn-out O-rings, washers, or cartridges are often the culprits. Mineral buildup can also cause leaks.
- Clogged Drain: Hair, soap scum, food particles, and other debris can accumulate in the drainpipe and cause a blockage.
- Slow Drain: Similar to a clogged drain, but the blockage is less severe.
- Leaky Drainpipe: Loose connections, corroded pipes, or damaged seals can cause leaks in the drainpipe assembly.
- Low Water Pressure: Clogged aerator, faulty faucet cartridge, or issues with the water supply system can cause low water pressure.
- No Hot Water: Problems with the water heater or the hot water supply line can result in a lack of hot water.
Step-by-Step Guide to Repairing a Leaky Faucet
A leaky faucet is a common problem that can waste water and increase your water bill. Here’s a step-by-step guide to repairing a leaky faucet:
- Turn off the water supply: Locate the shut-off valves under the sink and turn them off. If you don’t have shut-off valves, you’ll need to turn off the main water supply to your house.
- Protect the sink: Cover the sink basin with a towel or cloth to prevent scratches.
- Disassemble the faucet: Depending on the type of faucet, you may need to remove the handle, spout, and other components to access the O-rings, washers, or cartridge. Consult the faucet’s instruction manual or search online for specific instructions.
- Inspect the parts: Examine the O-rings, washers, and cartridge for wear and tear. Replace any damaged parts with new ones.
- Reassemble the faucet: Carefully reassemble the faucet, making sure all parts are properly aligned and tightened.
- Turn on the water supply: Slowly turn on the water supply and check for leaks. If the faucet is still leaking, double-check your work and make sure all connections are tight.
How to Clear a Clogged Sink Drain
A clogged sink drain can be a nuisance, but it’s often a relatively easy problem to fix. Here are several methods for clearing a clogged sink drain:
- Boiling Water: Pour a pot of boiling water down the drain. This can often dissolve grease and soap buildup.
- Plunger: Use a plunger to create suction and dislodge the clog. Make sure there is enough water in the sink to cover the cup of the plunger.
- Baking Soda and Vinegar: Pour 1 cup of baking soda down the drain, followed by 1 cup of vinegar. Let it fizz for 30 minutes, then flush with hot water.
- Drain Snake: A drain snake is a flexible tool that can be inserted into the drain to break up or retrieve the clog.
- Chemical Drain Cleaner: Use chemical drain cleaners as a last resort, as they can be harsh and corrosive. Always follow the manufacturer’s instructions carefully.
Repairing a Leaky Drainpipe
A leaky drainpipe can cause water damage and mold growth. Here’s how to repair a leaky drainpipe:
- Identify the source of the leak: Carefully inspect the drainpipe assembly to pinpoint the exact location of the leak.
- Tighten loose connections: Use a wrench to tighten any loose connections. Be careful not to overtighten, as this can damage the pipes.
- Replace damaged parts: If the leak is coming from a corroded pipe or a damaged seal, you’ll need to replace the affected part.
- Apply plumber’s putty or Teflon tape: Use plumber’s putty to seal around drain flanges and Teflon tape to seal threaded connections.
Faucet Cartridge Replacement: A Detailed Guide
The faucet cartridge is a critical component that controls water flow and temperature. A faulty cartridge can lead to leaks, drips, and inconsistent water temperature. Replacing the cartridge is a common repair that can restore your faucet’s functionality. Here’s a detailed guide:
- Turn off the water supply: As always, begin by turning off the water supply to the faucet.
- Remove the faucet handle: The method for removing the handle varies depending on the faucet model. Typically, you’ll need to loosen a setscrew or remove a decorative cap to access the screw that holds the handle in place.
- Remove the cartridge retaining clip or nut: Once the handle is removed, you’ll see a retaining clip or nut that secures the cartridge in place. Remove this clip or nut using pliers or a wrench.
- Pull out the old cartridge: Carefully pull the old cartridge straight out of the faucet body. You may need to wiggle it gently to loosen it.
- Install the new cartridge: Insert the new cartridge into the faucet body, making sure it is properly aligned.
- Reinstall the retaining clip or nut: Secure the new cartridge with the retaining clip or nut.
- Reattach the faucet handle: Reattach the faucet handle and tighten the screw.
- Turn on the water supply: Turn on the water supply and check for leaks.
Choosing the Right Sink Repair Professional
While many sink repairs are DIY-friendly, some situations require the expertise of a professional plumber. Here are some factors to consider when deciding whether to call a plumber:
- Complexity of the repair: If the repair involves complex plumbing work or requires specialized tools, it’s best to hire a professional.
- Extent of the damage: If the sink is severely damaged or corroded, a professional may be needed to assess the situation and recommend the best course of action.
- Your comfort level: If you’re not comfortable working on plumbing projects or you’re unsure about any step of the repair process, it’s always best to err on the side of caution and call a professional.
Preventive Maintenance for Your Sink
Preventive maintenance can help you avoid costly sink repairs down the road. Here are some tips for keeping your sink in good condition:
- Avoid pouring grease down the drain: Grease can solidify in the drainpipe and cause clogs.
- Use a strainer: A strainer will catch hair, food particles, and other debris, preventing them from entering the drainpipe.
- Flush the drain regularly: Flush the drain with hot water regularly to prevent buildup.
- Clean the aerator: Clean the faucet aerator periodically to remove mineral deposits and maintain good water pressure.
- Inspect for leaks: Regularly inspect the sink and drainpipe for leaks. Address any leaks promptly to prevent water damage.
The Importance of Proper Sealing and Caulking
Proper sealing and caulking are essential for preventing leaks and water damage around your sink. Here’s why:
- Watertight seal: Sealing and caulking create a watertight seal between the sink and the countertop, preventing water from seeping into the surrounding areas.
- Preventing mold growth: Water leaks can lead to mold growth, which can be harmful to your health. Proper sealing and caulking can help prevent mold growth.
- Protecting the countertop: Water can damage the countertop material, especially if it’s made of wood or laminate. Sealing and caulking can protect the countertop from water damage.
Sink Repair and Sustainability
Opting for sink repair over replacement aligns with sustainable practices. Repairing extends the lifespan of existing fixtures, reducing the demand for new manufacturing and minimizing waste. This approach not only saves resources but also reduces the carbon footprint associated with production and disposal.
Expert Tips for Long-Lasting Sink Repairs
Based on years of experience, the key to a long-lasting sink repair lies in using high-quality replacement parts and taking the time to do the job right. Always double-check connections, use the appropriate sealants, and don’t hesitate to consult a professional if you’re unsure about any aspect of the repair.
Choosing the Right Materials for Your Sink Repair
Selecting compatible materials is crucial. For instance, using the wrong type of pipe sealant can lead to corrosion or leaks. Similarly, choosing a low-quality replacement faucet can result in premature failure. Investing in durable, compatible materials ensures a longer lifespan for your sink and plumbing system.
The Future of Sink Repair: Innovations and Trends
The plumbing industry is constantly evolving, with new technologies and materials emerging all the time. From self-sealing pipes to advanced leak detection systems, the future of sink repair promises to be more efficient and less intrusive. Staying informed about these advancements can help you make better decisions about your sink repair and maintenance.
Taking Control of Your Sink Maintenance
By understanding the fundamentals of sink repair and preventive maintenance, you can take control of your home’s plumbing system and avoid costly repairs. Addressing minor issues promptly and performing regular maintenance can extend the life of your sink and keep it functioning properly for years to come. We hope this guide has provided the knowledge and confidence you need to tackle common sink problems and maintain a healthy plumbing system. Don’t hesitate to share your own sink repair experiences in the comments below!
